Having the right tool for the job is only half the battle; knowing how to use it is where battles are fought and won. You've chosen the best custom DNS service out there - here's how to set it up on what is, arguably, the internet's favourite browser: Google Chrome.
There are three main protocols for modern, secure DNS: DoH, DoT, and DoQ, with the latter being the new kid on the block. DoT & DoQ are more susceptible to being blocked by firewalls since they use custom ports, while DoH uses the same port as HTTPS, which makes it difficult to block.
While Control D supports all three protocols, Chrome, like most browsers, only supports DoH, so let's take a look at how to set that up.
Step #1
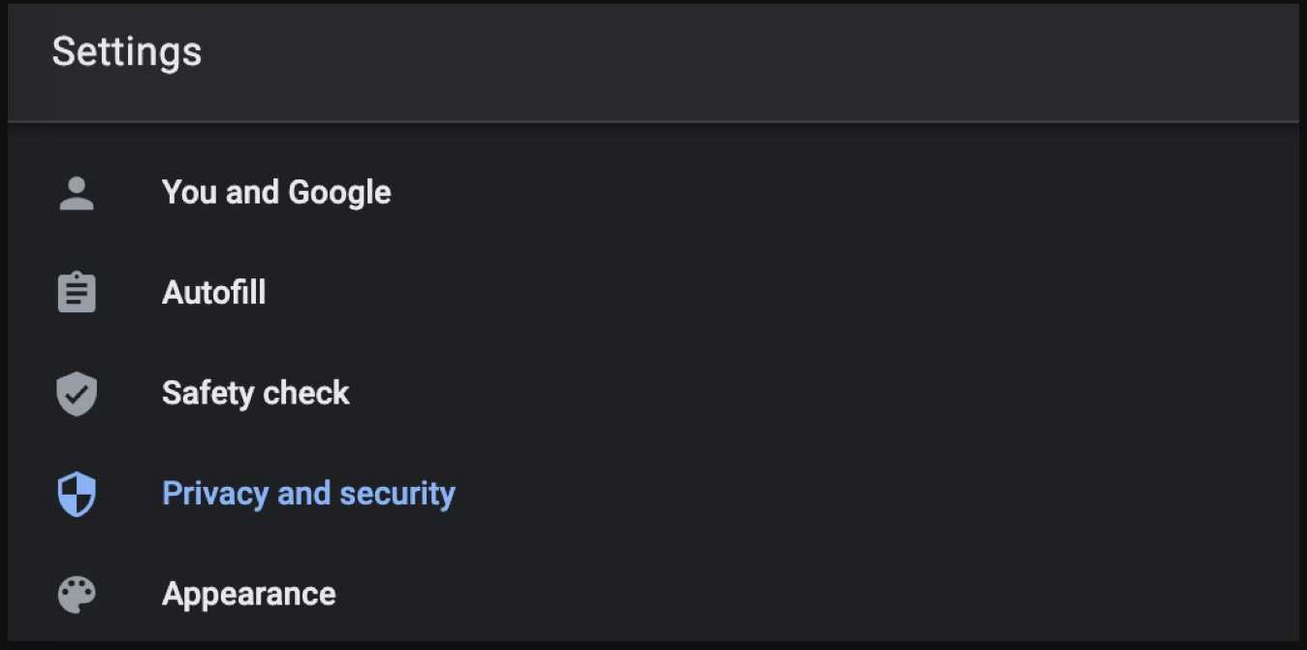
In your Chrome browser, click on the dotted menu in the top right corner, then click Settings.
Accessing Chrome preferences on Windows or Linux involves the same method with slight variances.

Step #2
Click on Privacy & Security from the list of options to the left.
Step #3
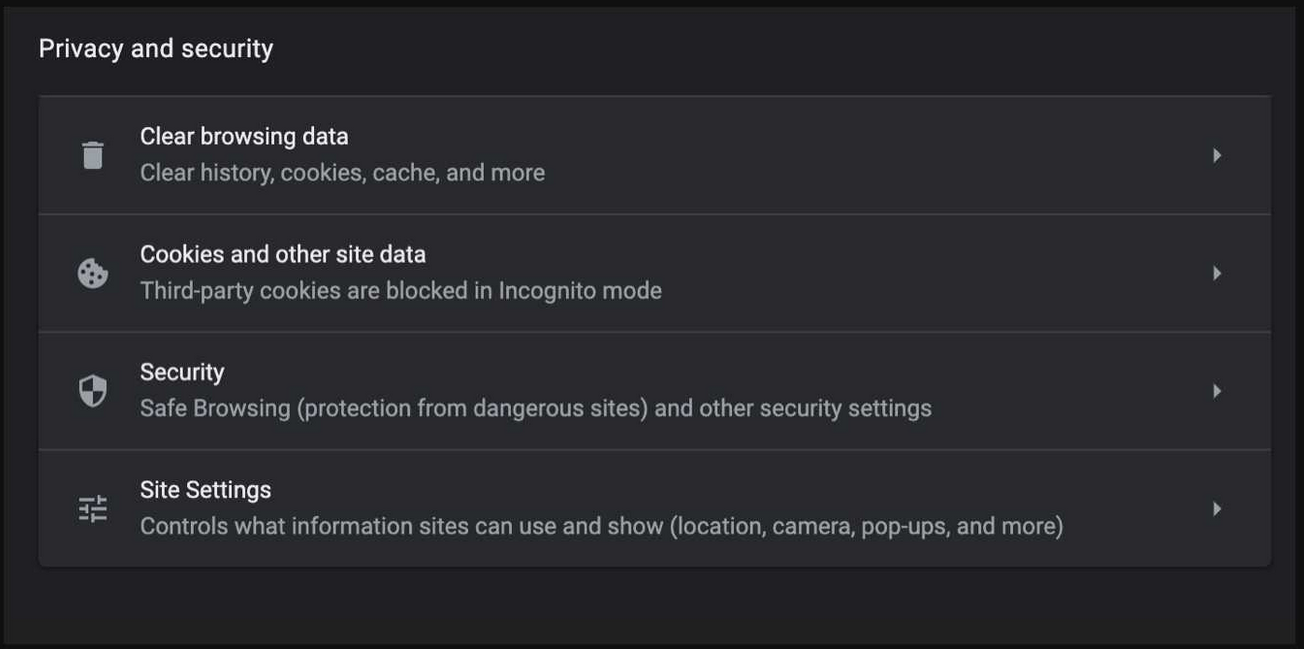
Click on Security.
Step #4
Scroll down until you see the Use Secure DNS toggle, and enable it.
Then, select the second option and choose Custom from the drop-down list.

Step #5
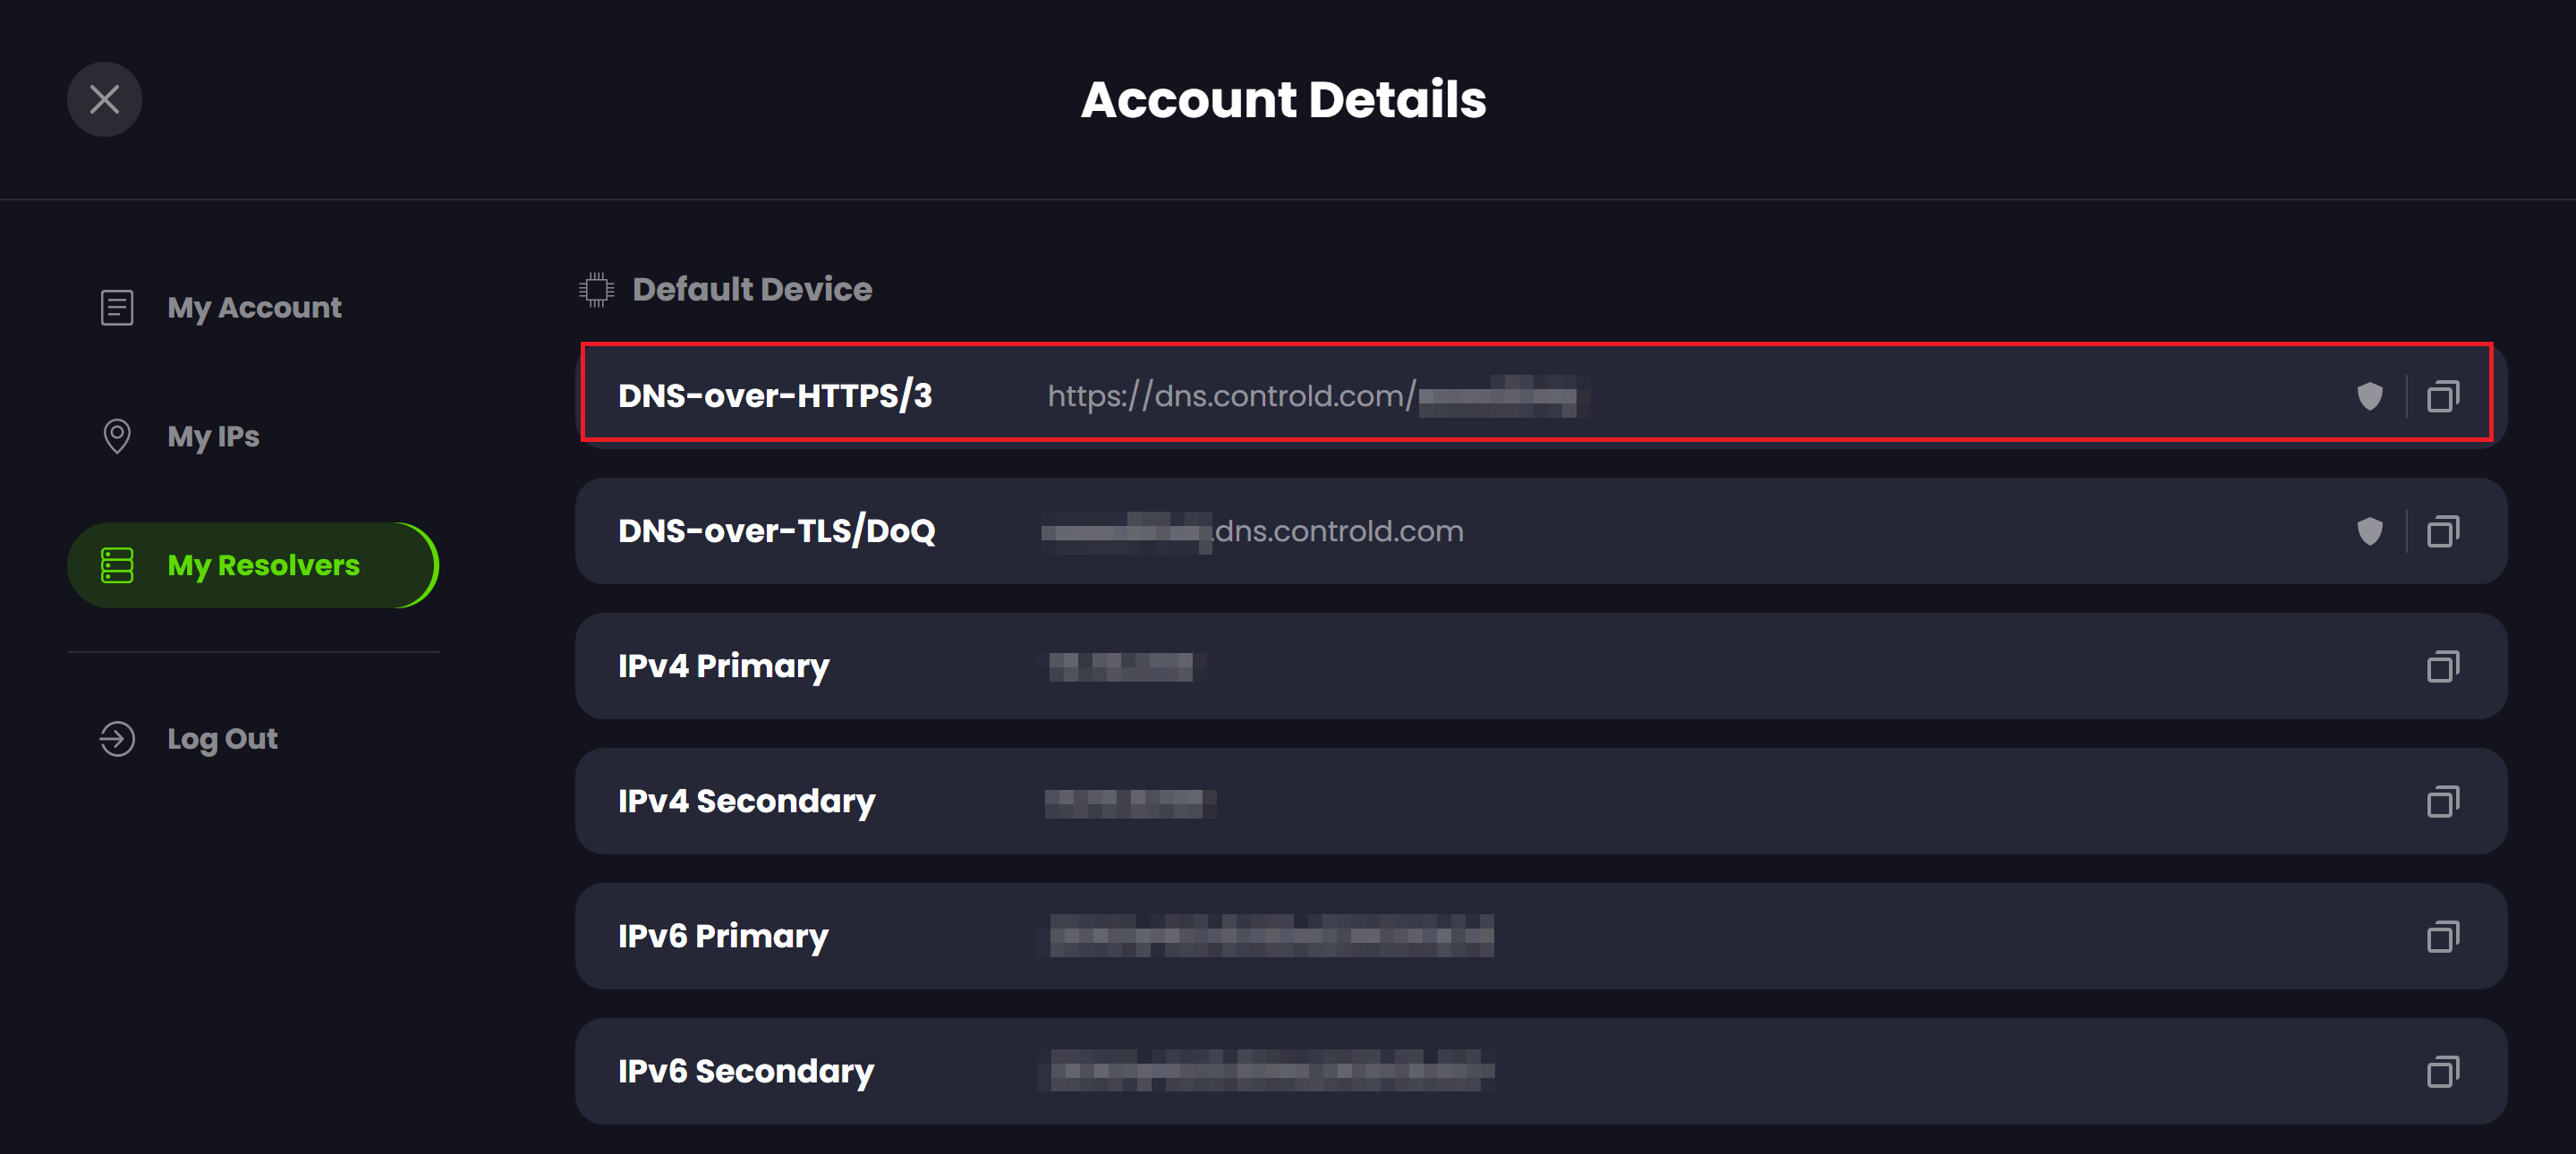
From the Control D My Resolvers section, copy and paste your device's DoH URL into the empty box. You'll need to switch over to your active Control D tab to do this.
Your My Resolvers section will look like the following. The section we're interested in is the one highlighted in Red.
Step #6
Once you've entered the DoH URL into the Chrome settings as instructed, you're all done! It's worth verifying that it's all working correctly, and you can do so in two ways.
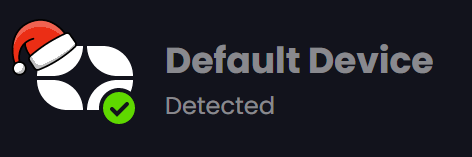
The first is simple: look at the logo in the top left corner of the Control D web UI and see if it has a green tick.
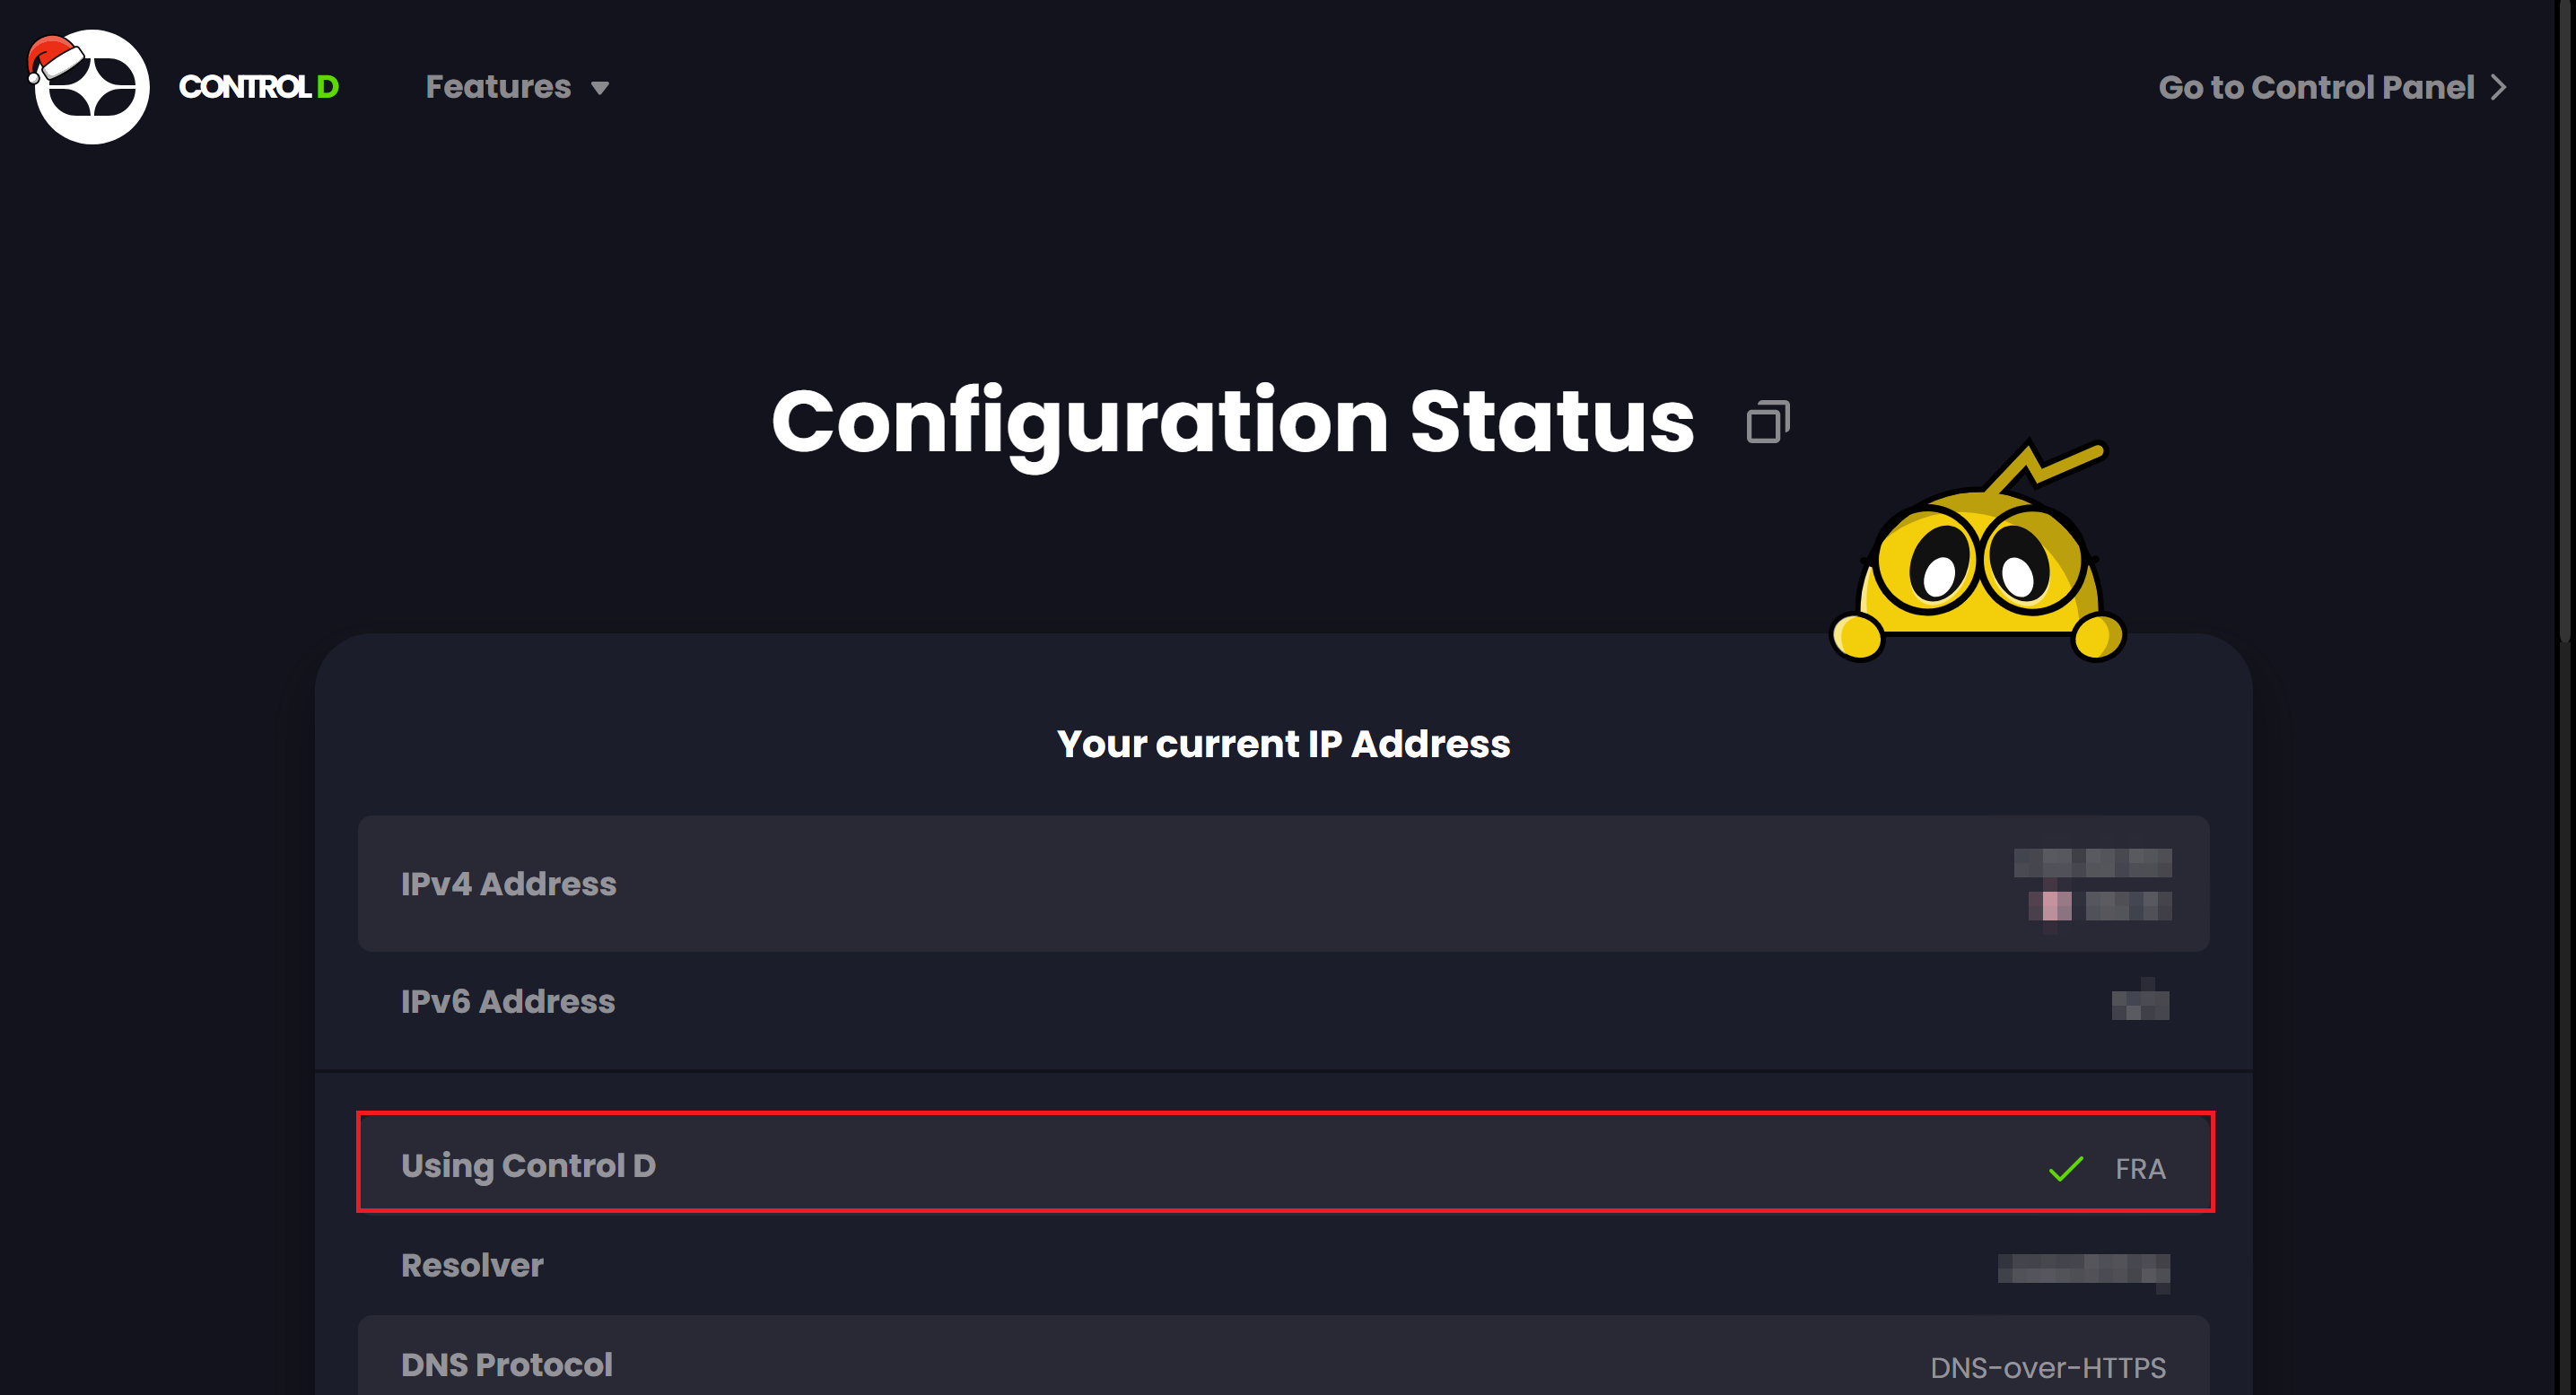
The other way to check is to visit the status page and look for a green tick next to "Using Control D."
Now that you've got everything set up, you can begin tweaking your profile settings and curating your internet experience.