Control D can be configured on any internet-connected device using a variety of methods, but what if you don't want to do that for every single device on your LAN because you have hundreds (or thousands) of them? Or perhaps this is public Wi-Fi and you don't control the individual devices on it. Fear not: there is a solution.

A quick note before we dive in: For the purposes of this article, I will use pfSense as the example device. The process is exactly the same on many other routers, however, including:
- ASUS Merlin
- DD-WRT
- Firewalla
- Fresh Tomato
- GL.iNet
- OpenWRT
- OPNsense
- pfSense
- Synology
- Ubiquiti UDM, UDR, EdgeOS
- Maybe others (some extra steps may be required)
This guide also assumes you already have a Control D account, as this offers a dead simple setup process - a mere two steps. This can also work with any other DNS provider, albeit with a few extra steps.
Introducing ctrld
ctrld is an open-source DNS proxy daemon that runs virtually on any hardware and operating system. Its core functionality involves spawning one or more Legacy DNS listeners, and sending the DNS queries to one or more upstreams while supporting most DNS protocols, including:
- UDP 53
- DNS-over-HTTPS
- DNS-over-TLS
- DNS-over-HTTP/3 (DOH3)
- DNS-over-QUIC
It can do a lot more than that (split-horizon DNS, routing policies, and more) but let's stick to basics for now. You want to deploy Control D on your LAN and benefit from Secure (encrypted) DNS protocols, even for devices that may not support them. Good for you, you're already ahead of the curve.
Create a Device
The first thing you have to do is go to the Control D web panel and create a Device for your router.
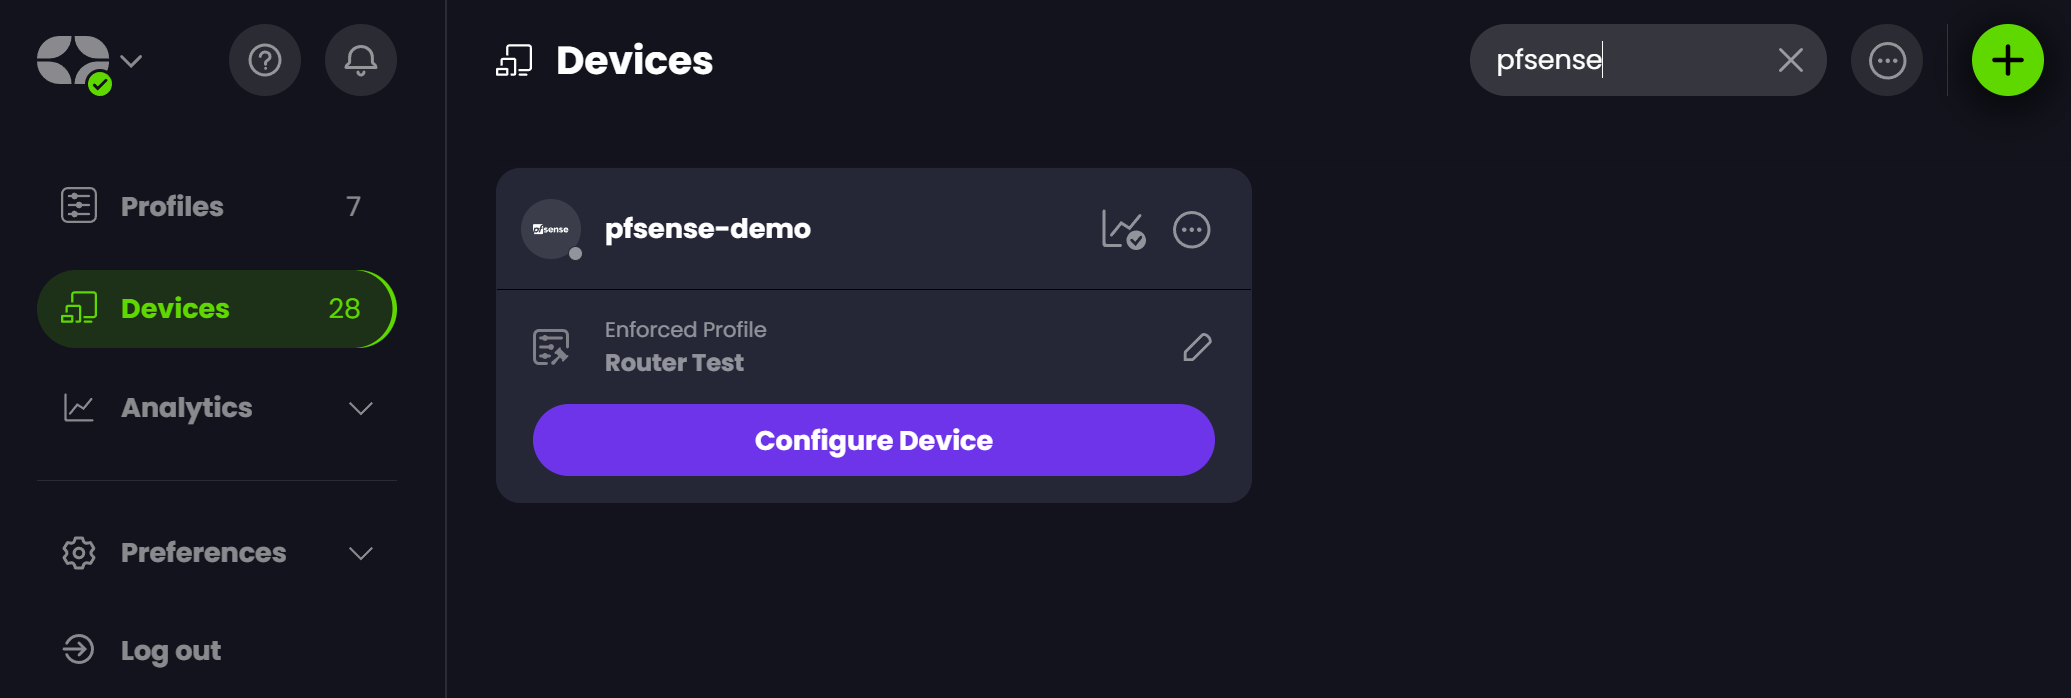
Now that you've done it, hit the Configure Device button. Choose Help Configure -> Automatic Setup. You will be presented with a screen like this.
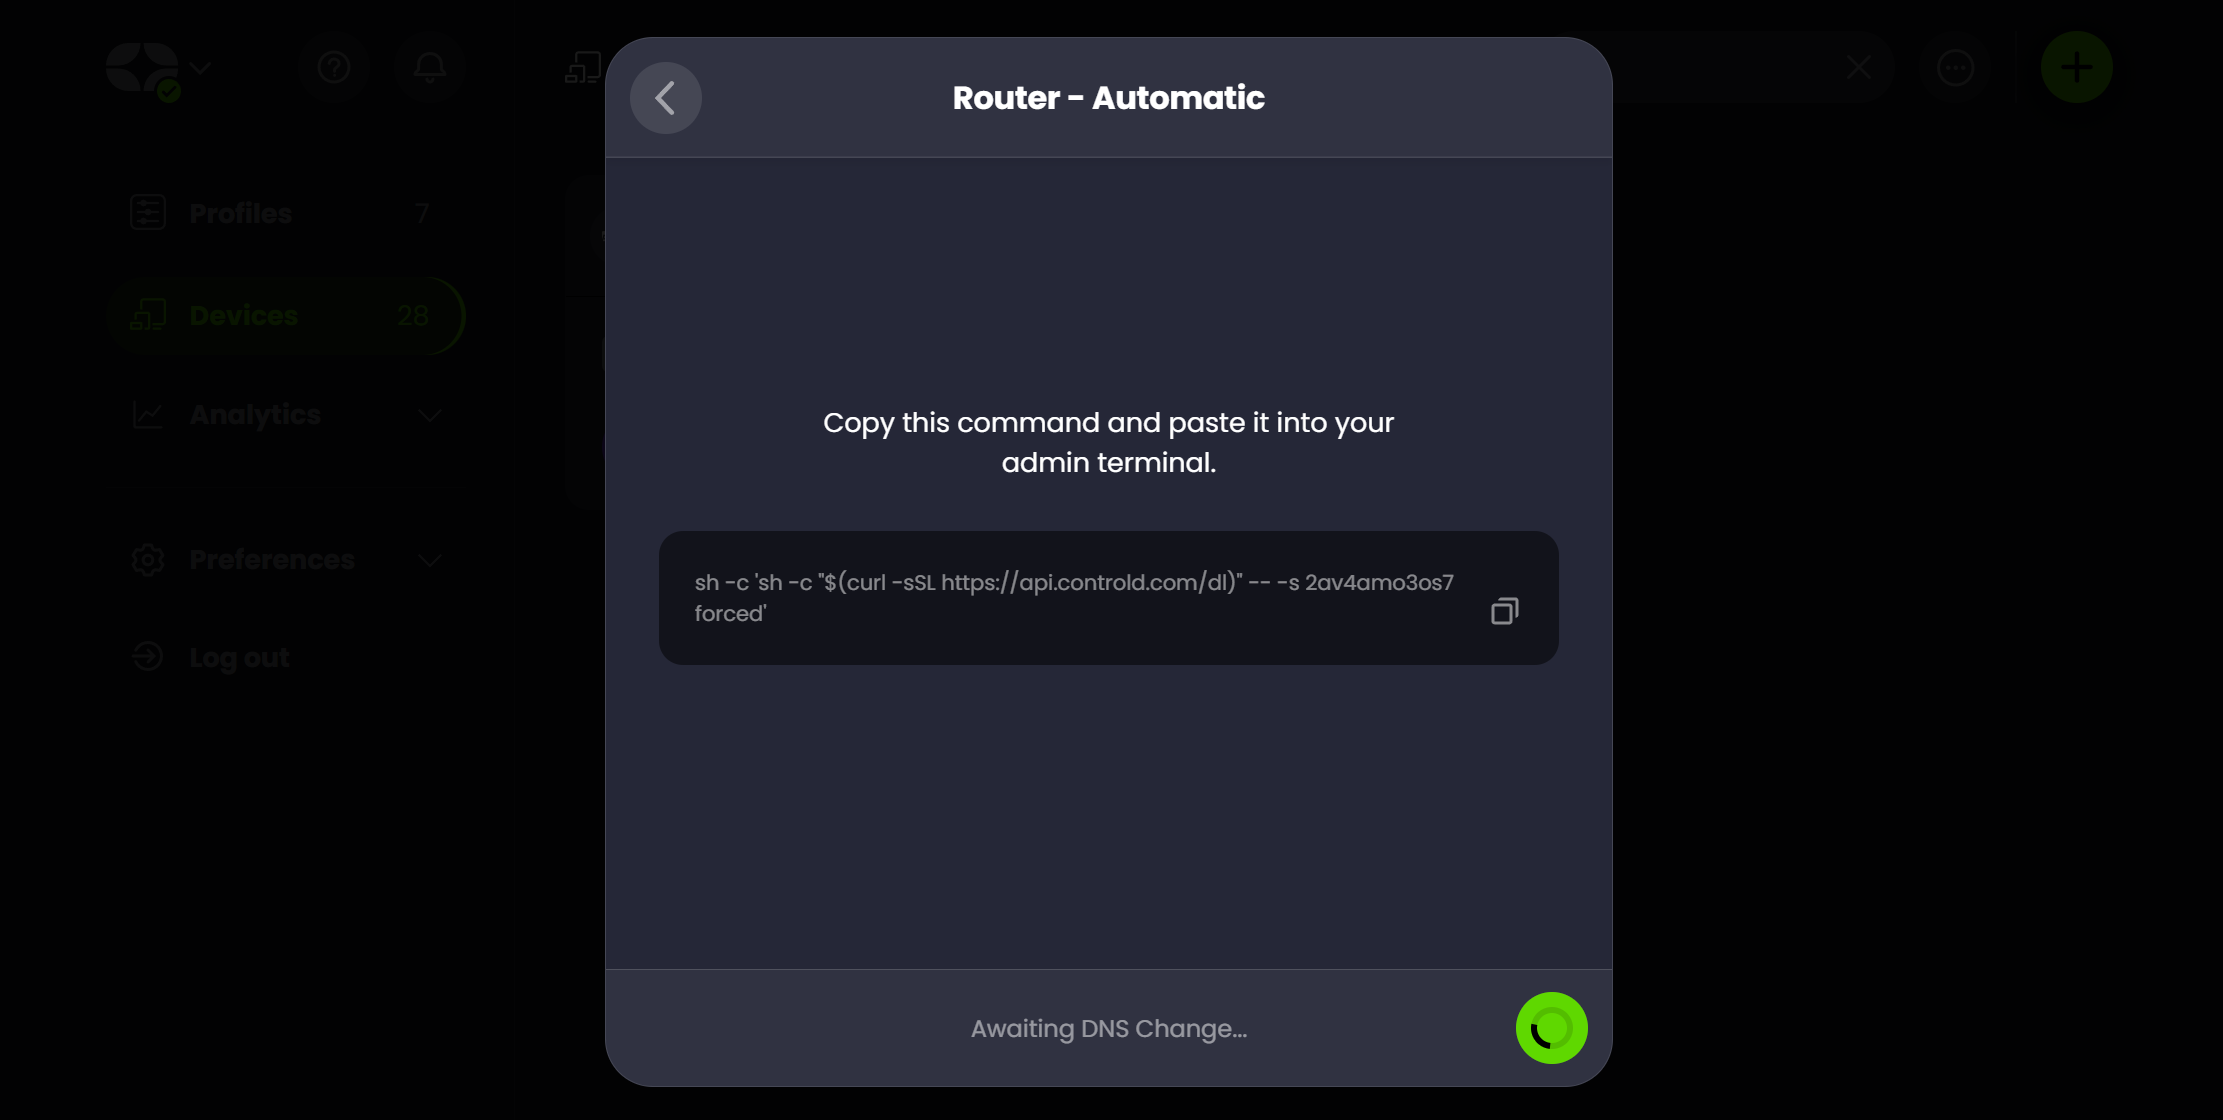
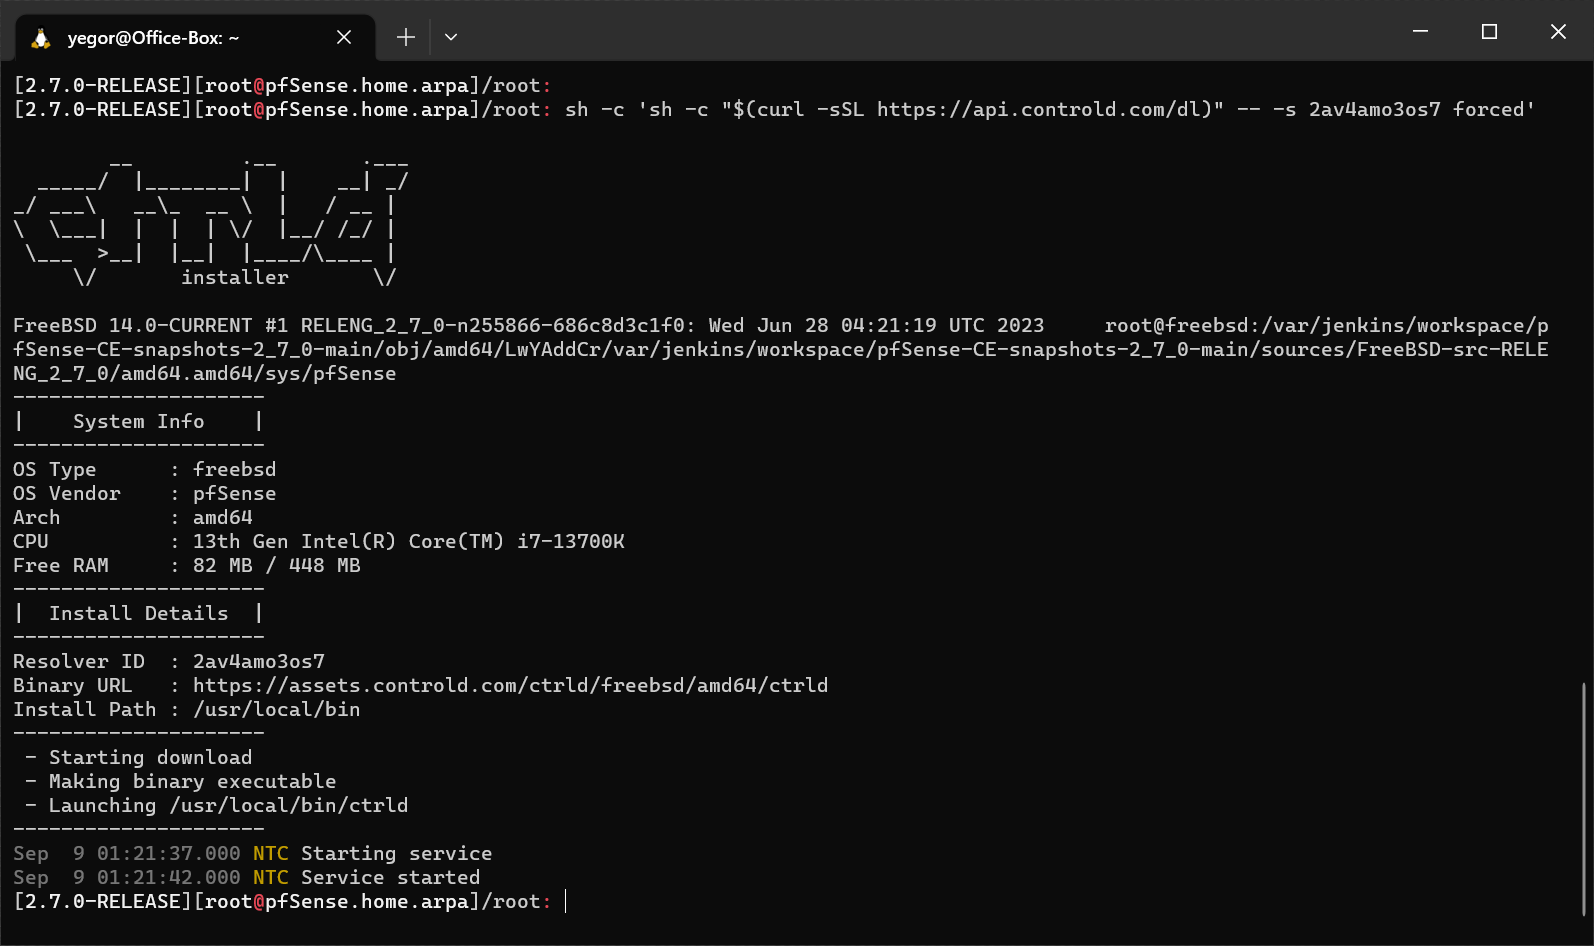
As you've probably guessed, you should SSH into your router, copy/paste the command you see above into the router shell, and hit ENTER.
That's it. You're done here. You can go and enjoy the rest of your day... or read further to see what else you can do.
LAN Clients
ctrld performs LAN client discovery using a variety of methods, including:
- DHCP leases file
- mDNS
- ARP
- PTR probes
- hosts file
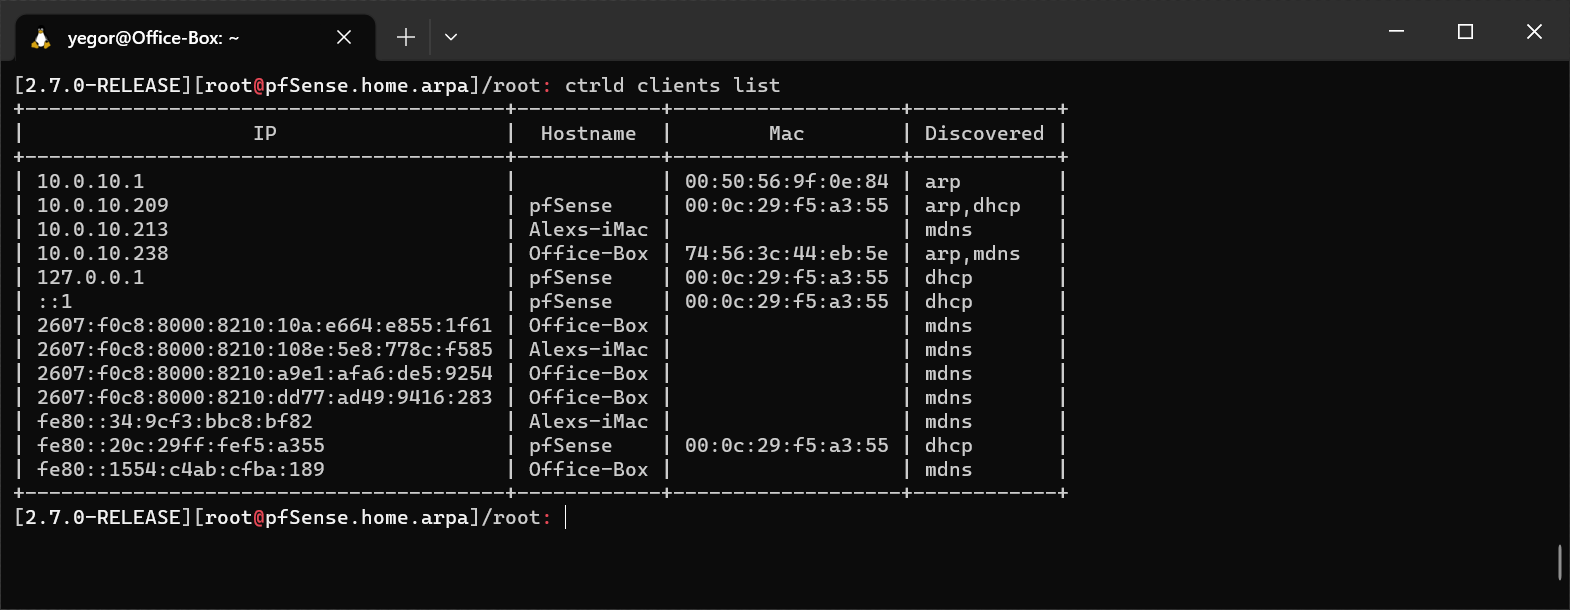
If you run the ctrld clients list command, you will see the clients it discovered, along with their IPs, Hostnames, and MAC addresses.
You may be thinking, "Cool, but so what?" So allow me to explain, my illustrious DNS friend.
When DNS queries are emitted from your LAN, ctrld will attach the client data along with every DNS query, so when you go into your Analytics section, you can see which LAN client made which DNS query.
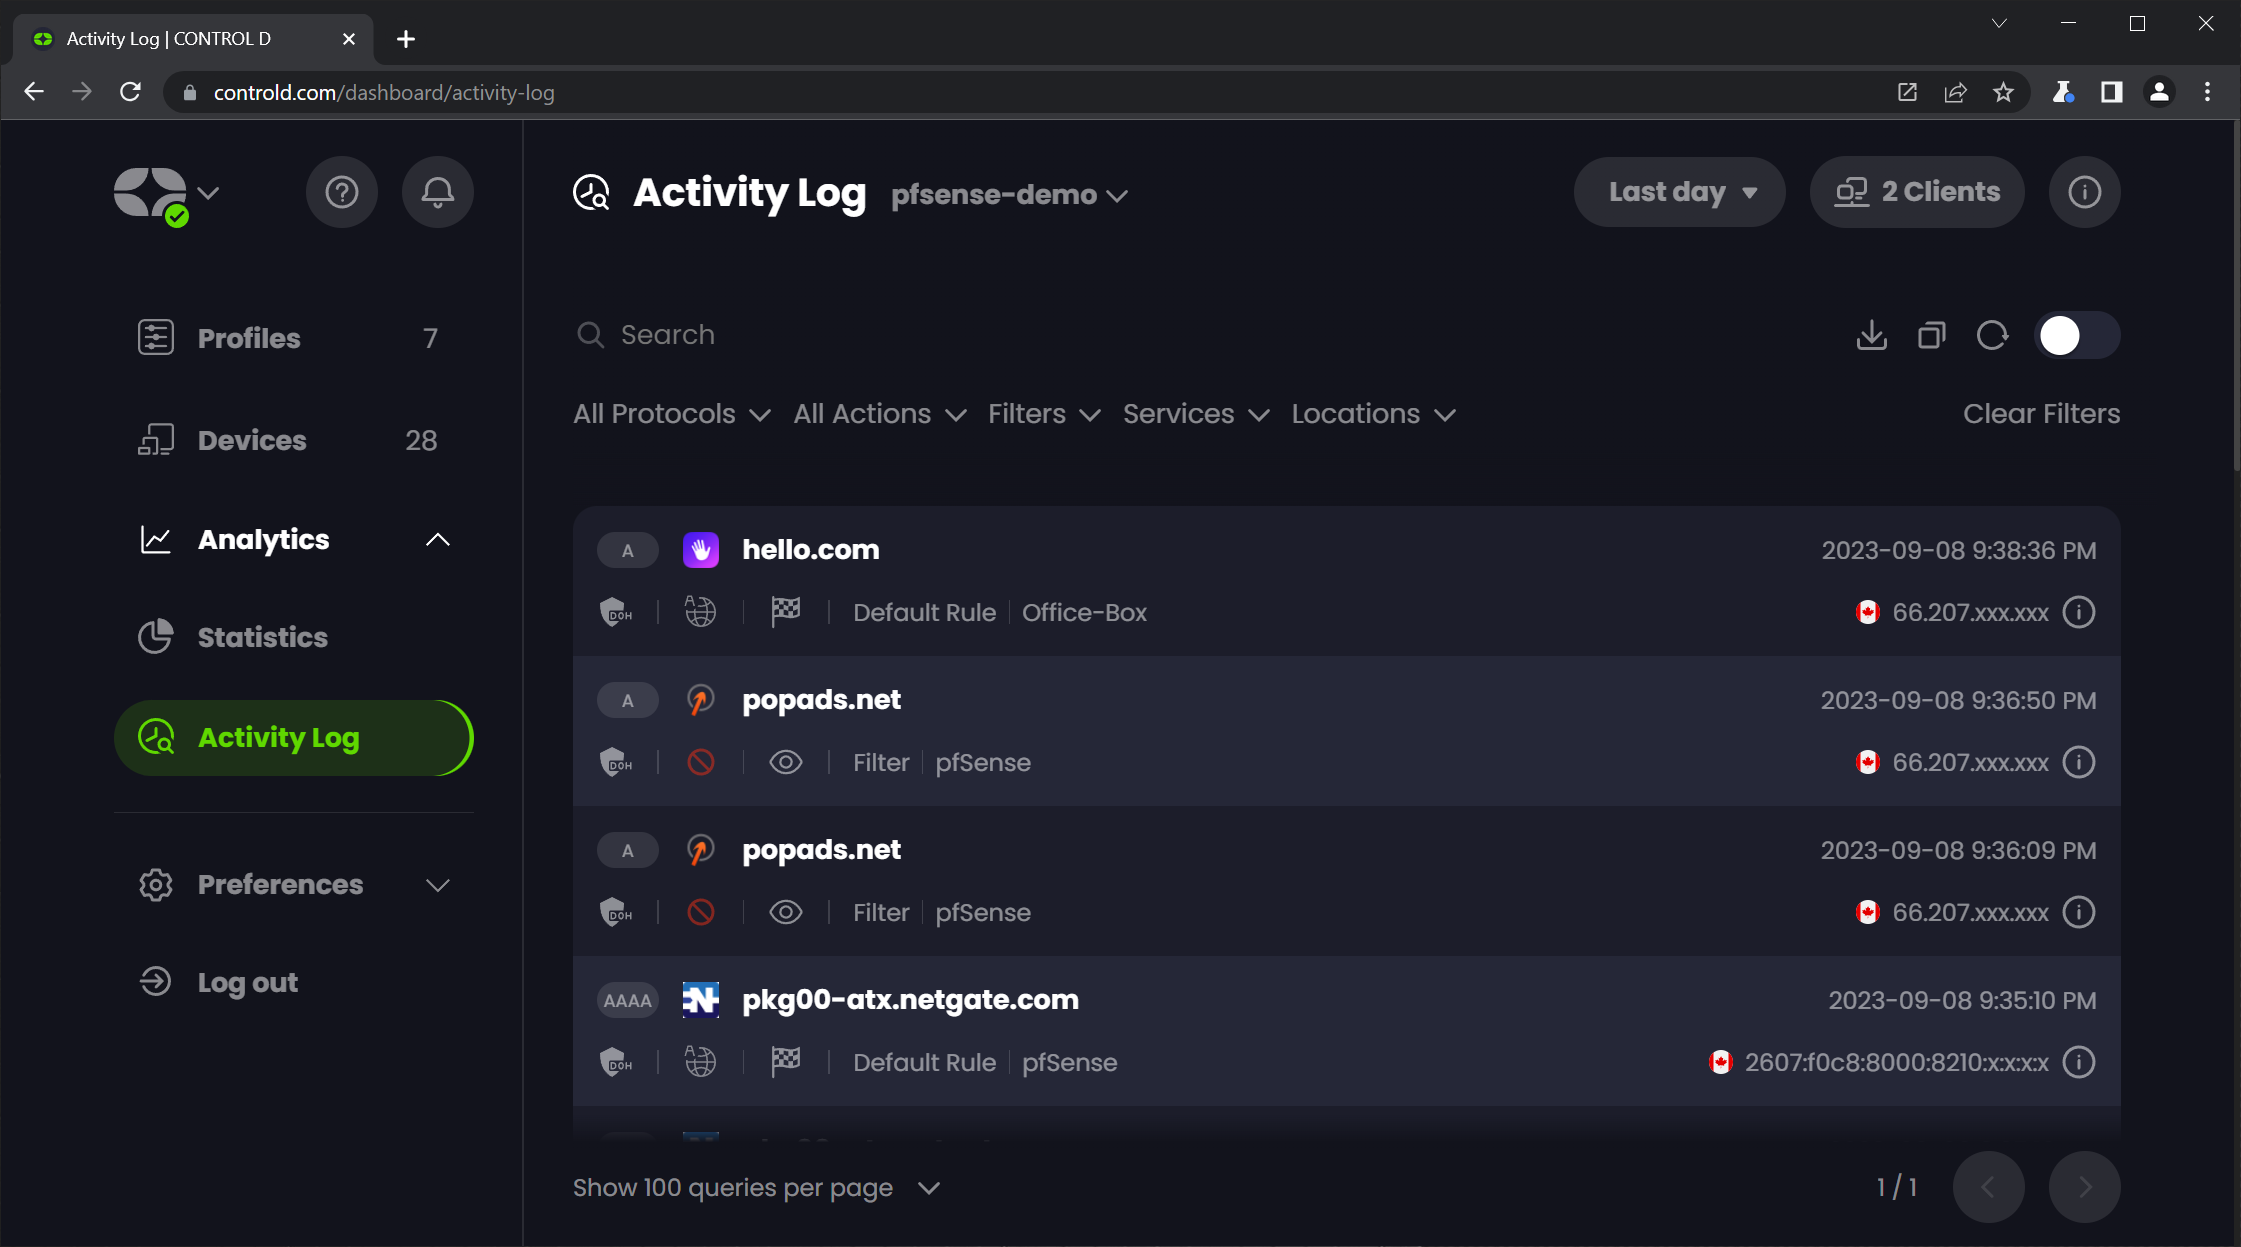
Now if you click the "2 Clients" button at the top right, you will see all the LAN clients that have emitted at least one DNS query from your LAN, how long ago, and their network details.
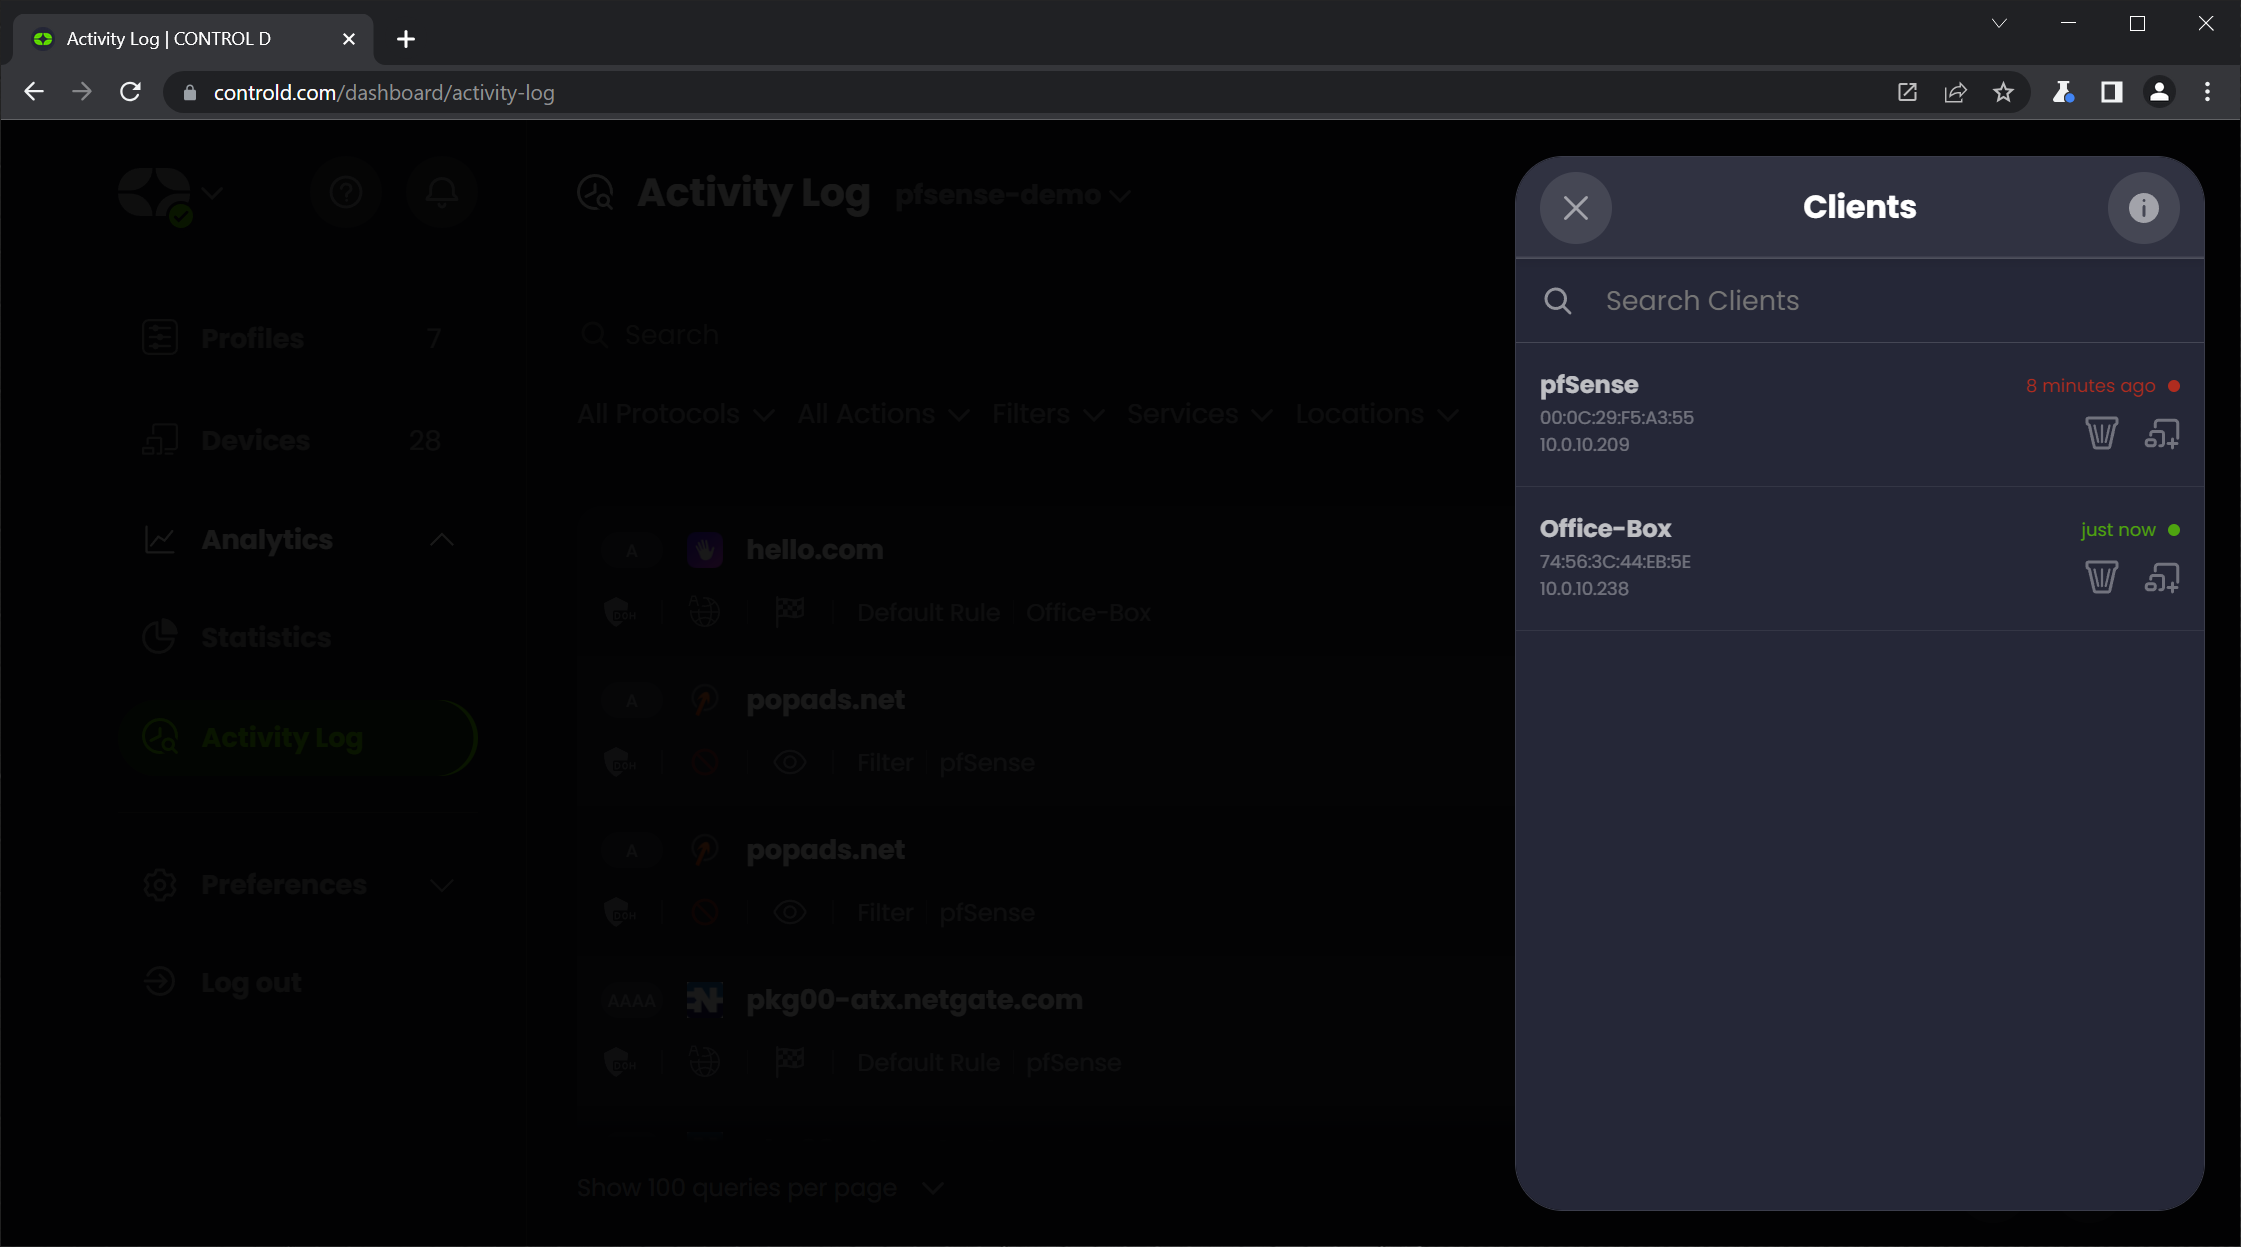
Special clients
From this screen, you can click the Add button to the right of each LAN client and re-map it to its own Control D Device, which enforces a different Profile. Why would you want to do that? Here is an example.
The Device configured on your Router enforces a very restrictive Profile, which blocks all kinds of things like adult "entertainment", gambling, etc. You wish to exclude one LAN client from such restrictive policies - for science, of course. Or you may wish to do the opposite of that and enforce a more strict Profile on a client because that one special person happens to be a child, or someone with a gambling problem (or both, if they're into Roblox).
These are the basics. If you wish to learn how you can customize ctrld with some advanced behaviors, or use it with a 3rd party DNS resolver because you don't have a Control D account (you should totally get one), read on!
Advanced Usages
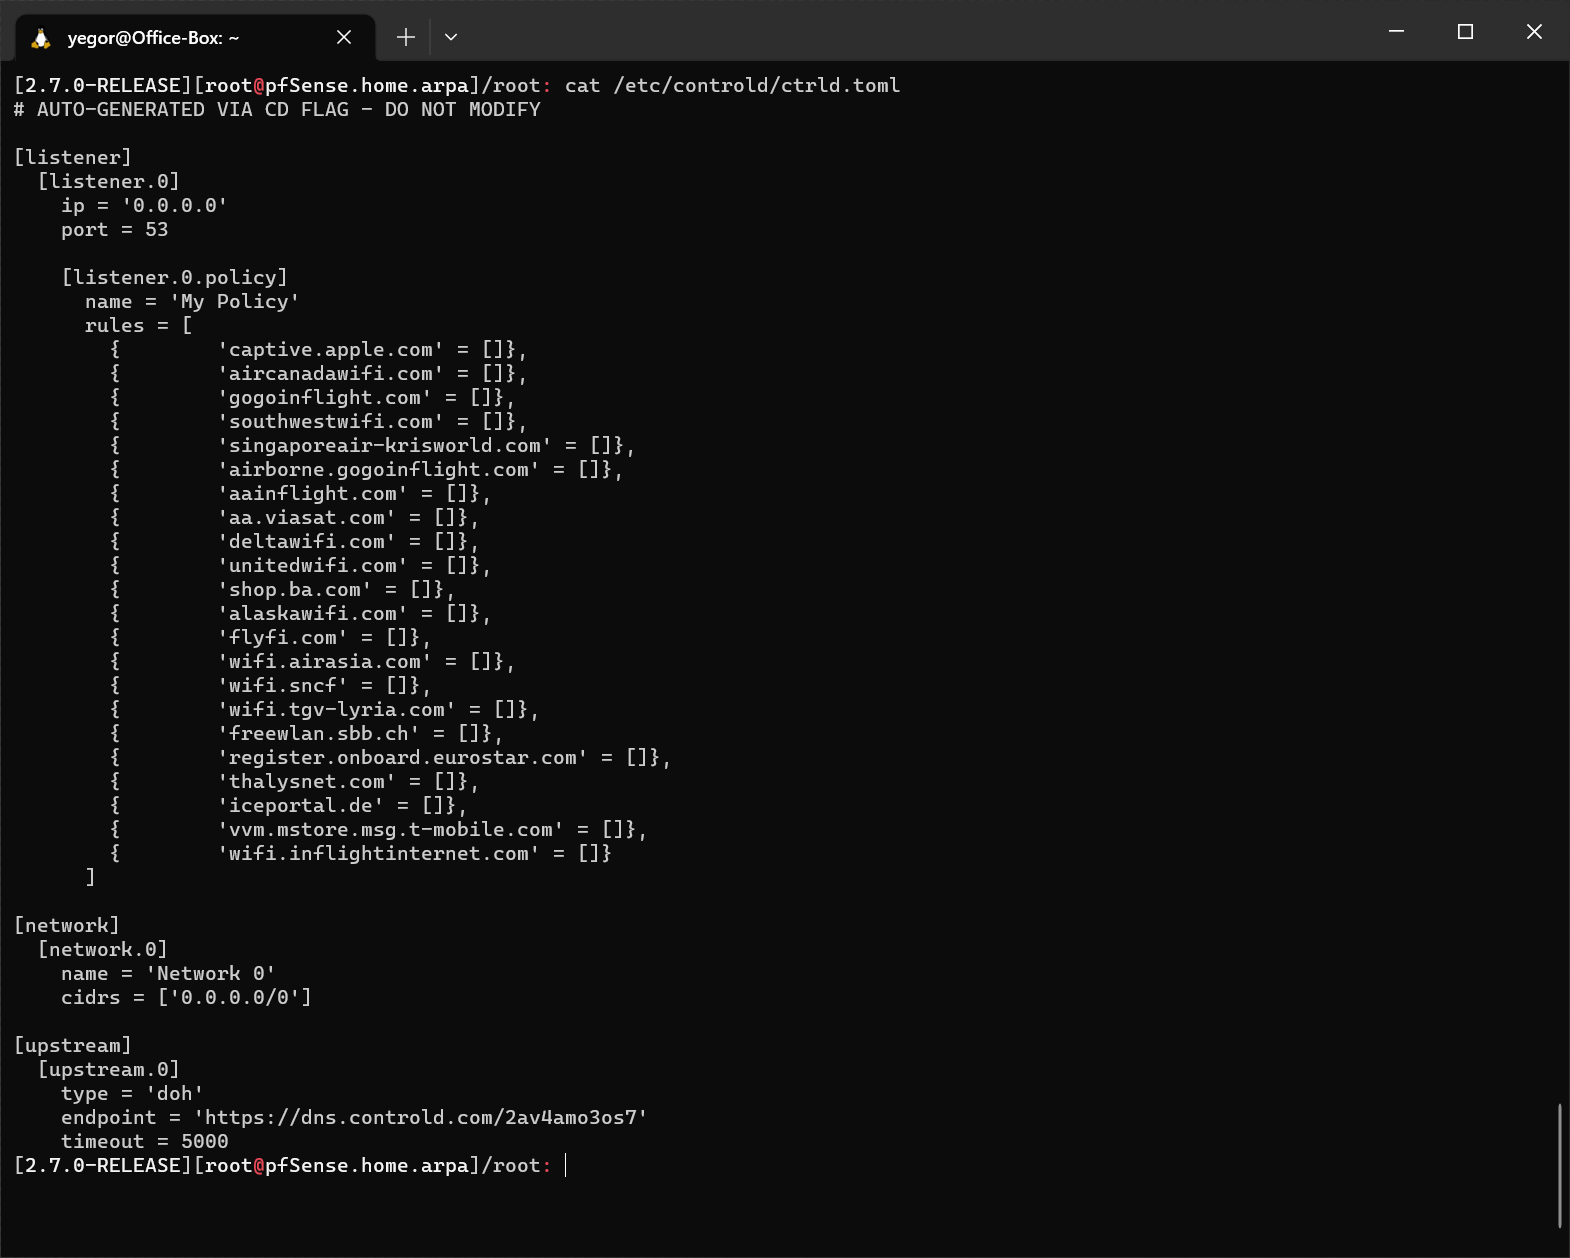
ctrld is entirely config driven, and by default, a very basic config is auto-generated and used. The basic config spawns a single listener and sends all DNS queries via DNS-over-HTTPS to your Device's unique DNS resolver. That is probably fine for most, but since you're reading this you have a thirst for more.

To view the basic configuration, look at this file: /etc/controld/ctrld.toml
This file looks like this (but your listener IP + port may be different).
To see what all these things mean, and what else you can do, I highly advise you to read the docs. Yeah, sorry about that. You can also view some example configurations to get you started.
Once you've read them, and want to modify this config for your special use case, pay close attention to the line at the top of the file:
# AUTO-GENERATED VIA CD FLAG - DO NOT MODIFY
This is because when you start ctrld using the installer, it fetches a remote config from the Control D API, and will keep doing so every time you restart the service. To modify the configuration to your liking, you can do it one of two ways:
- Via the Control D web panel
- Local config mode
Let's quickly go over these 2 methods.
Custom Config: Via Control D Web Panel
Click the terminal-looking button in the web panel. That's the one with that red arrow I scribbled on top of the screenshot.
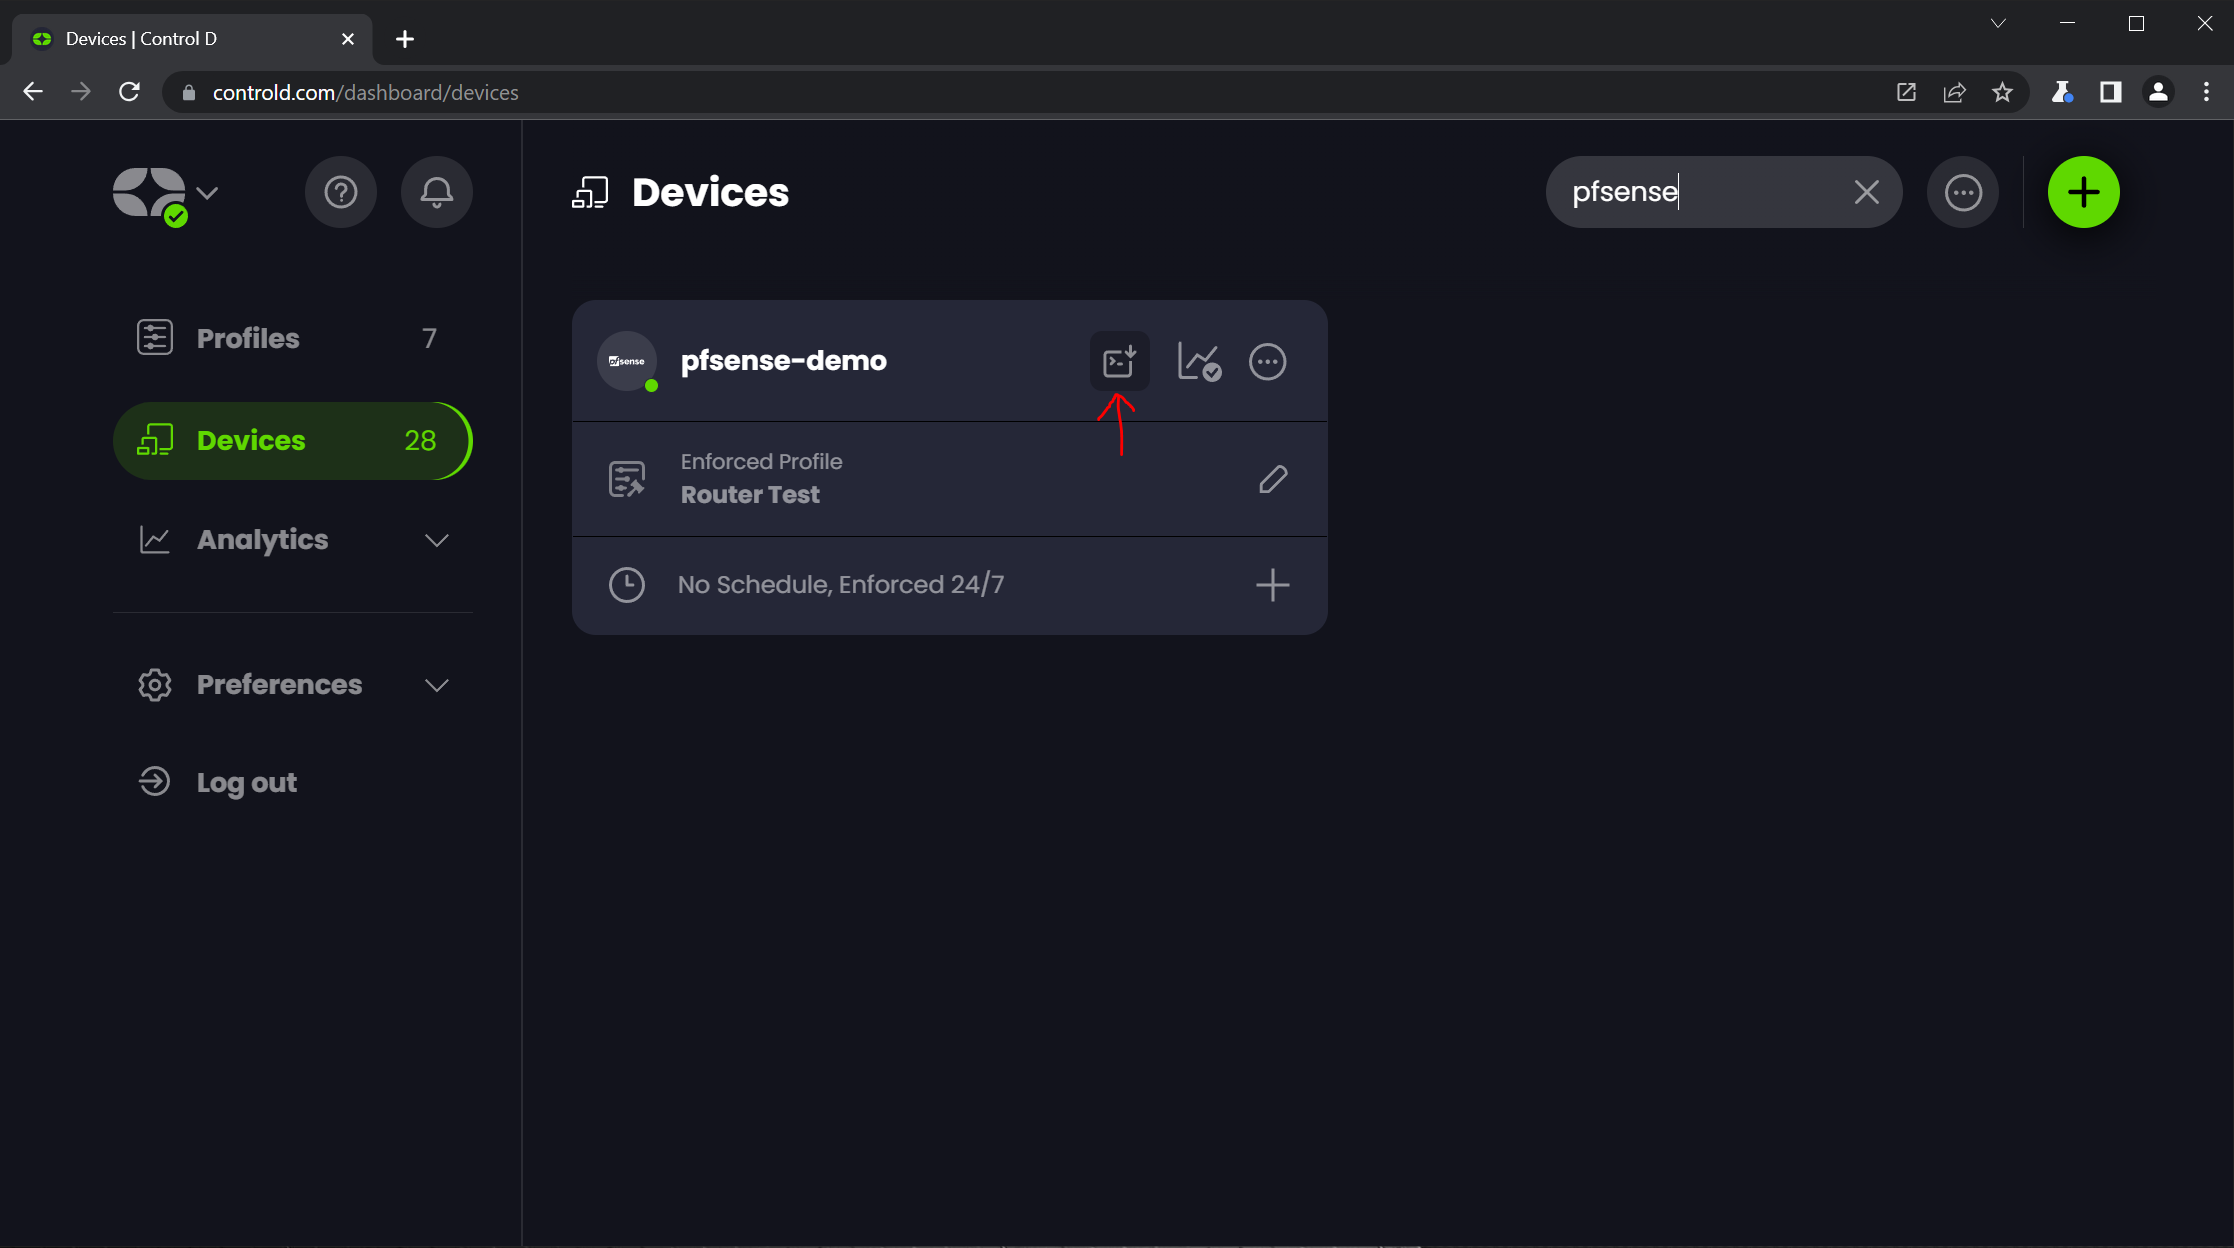
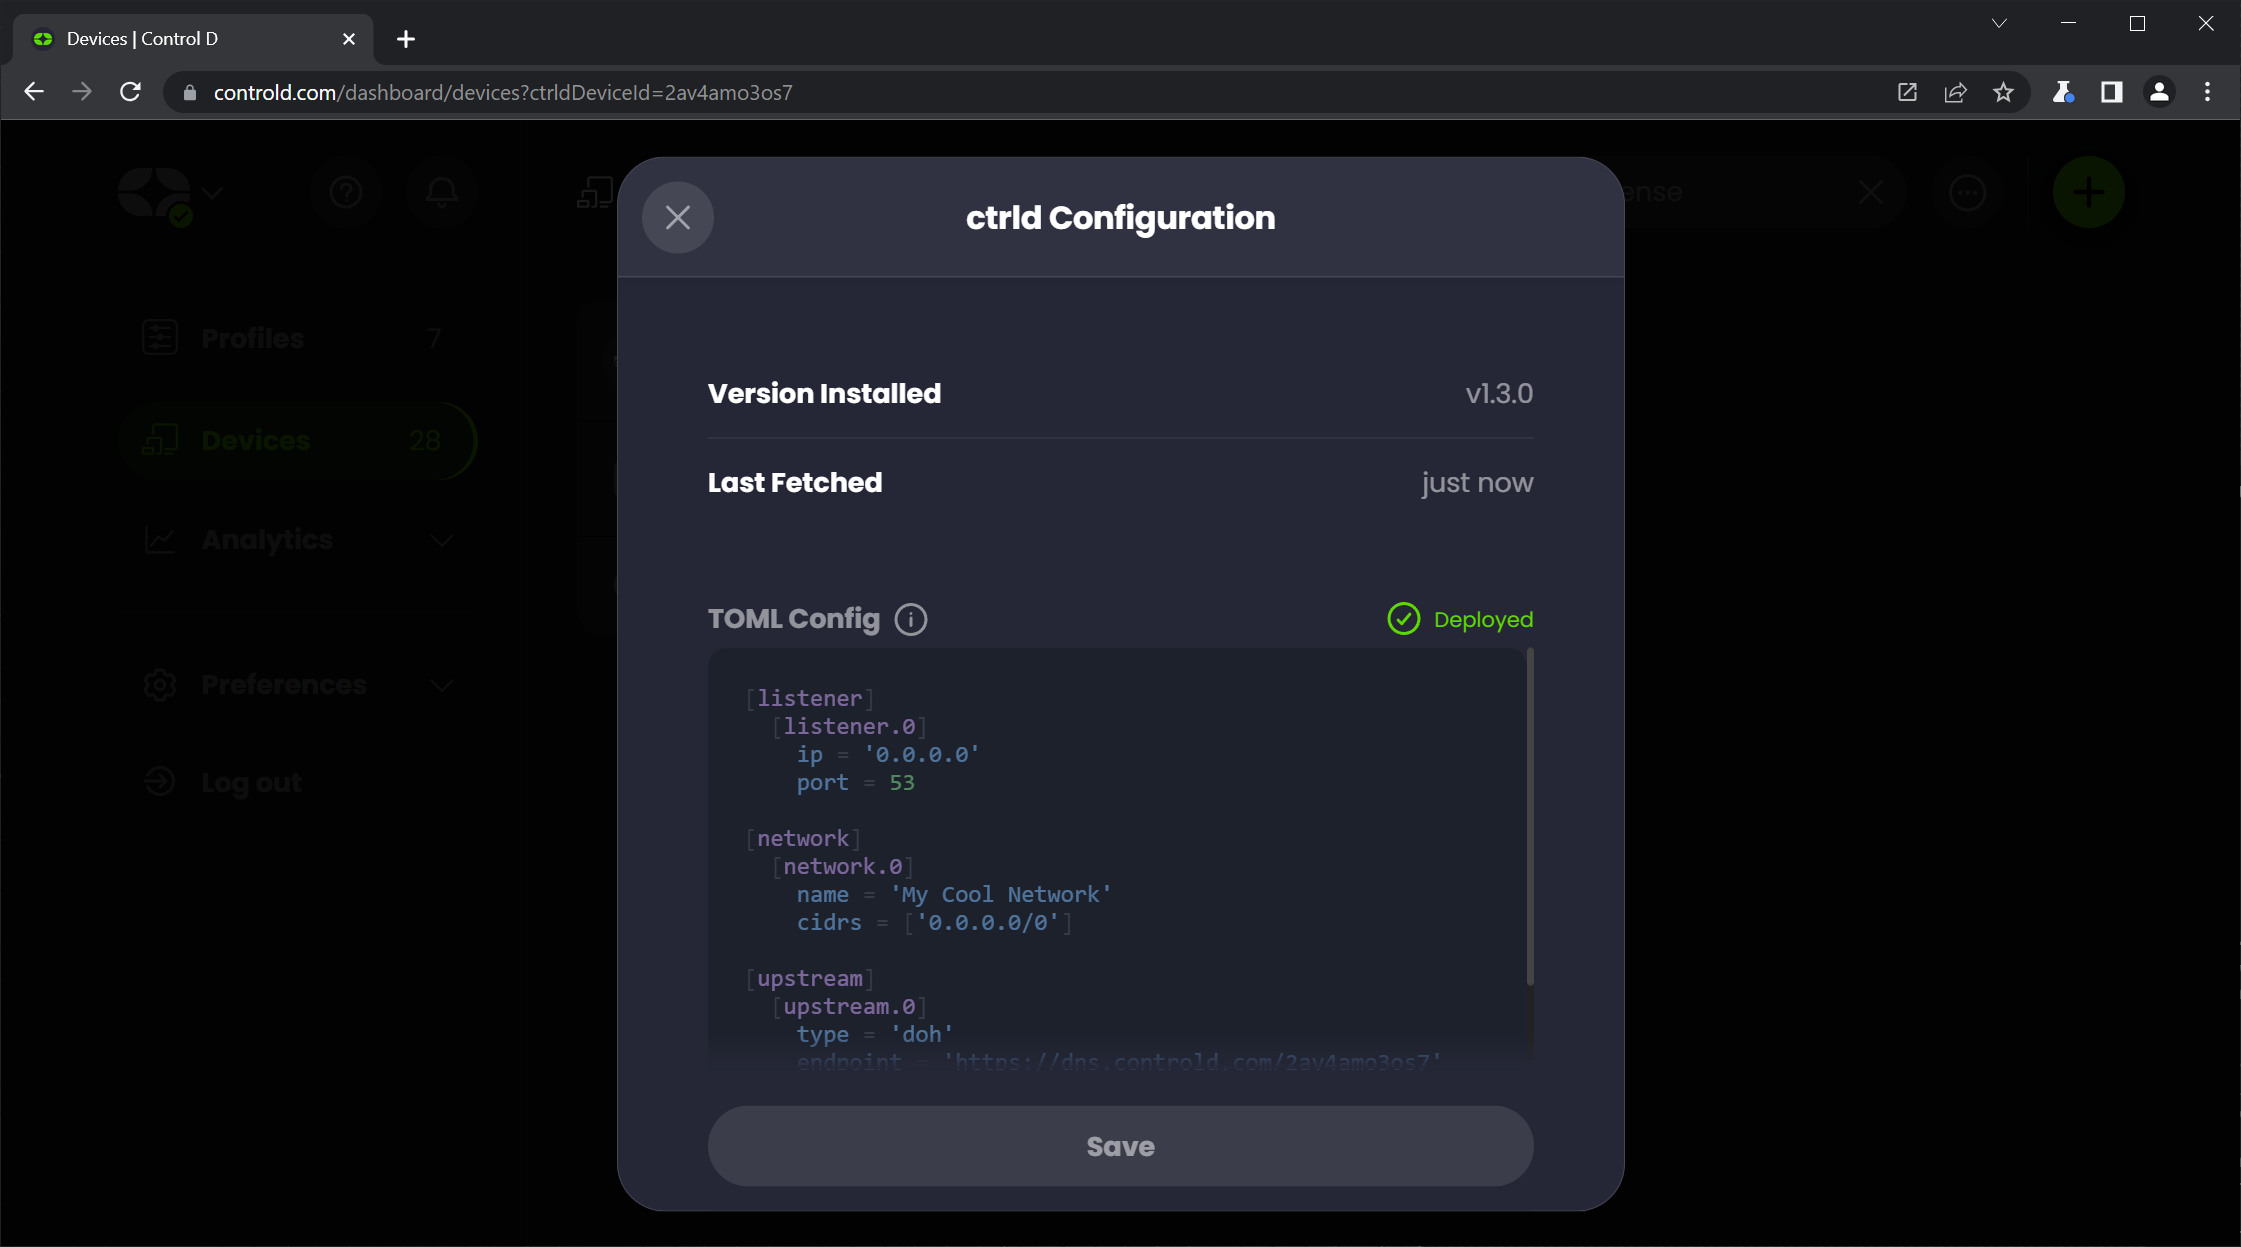
This will bring up a modal where you can paste your custom config.
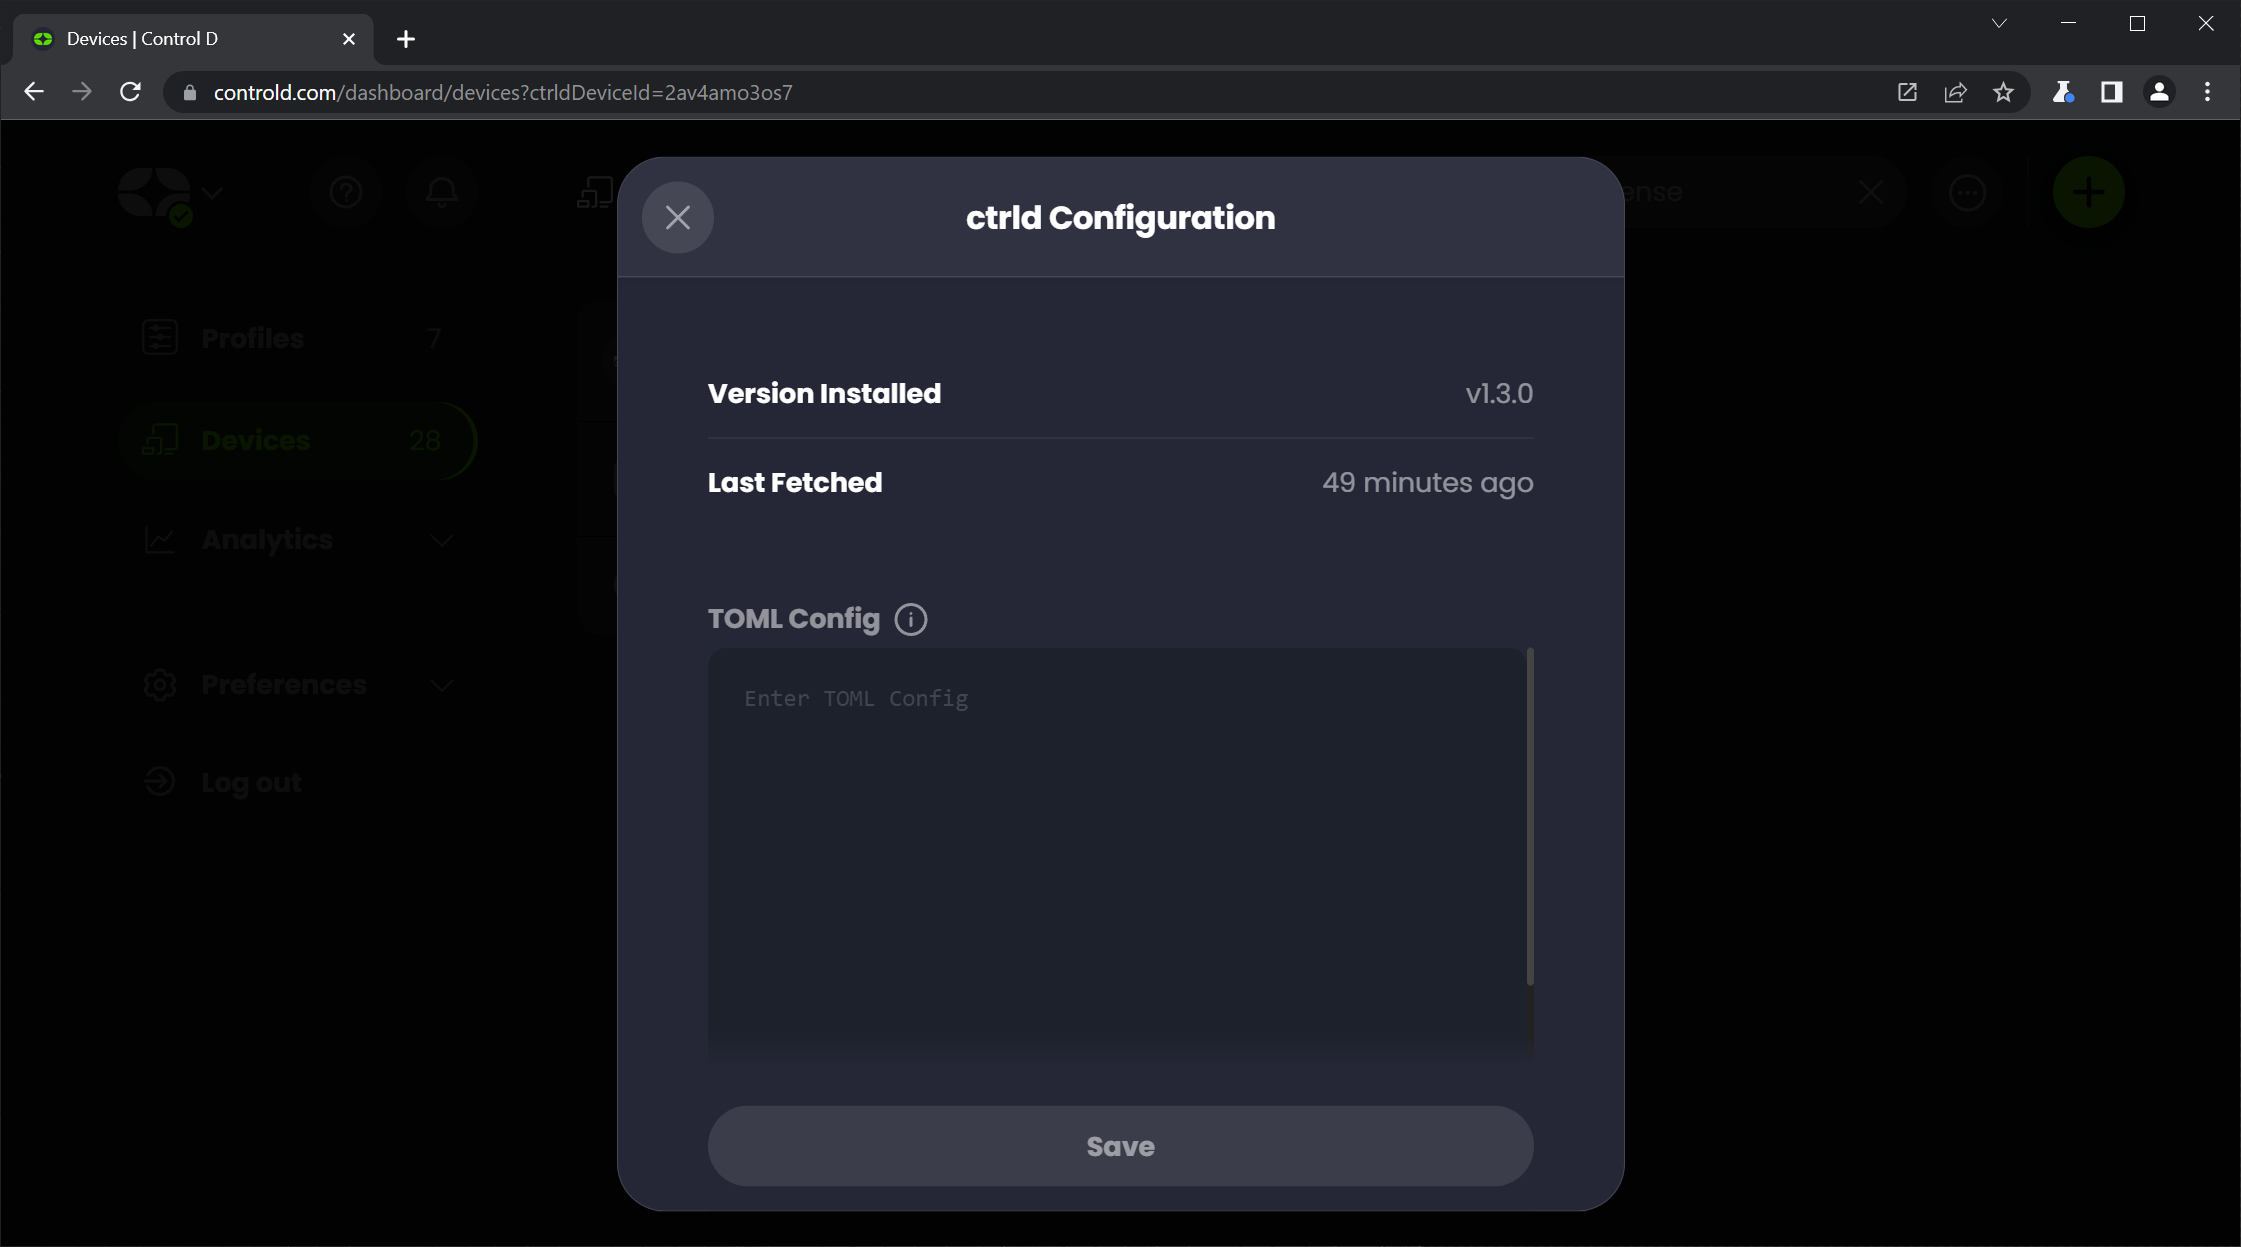
Once you press Save, absolutely nothing will happen.... until the ctrld service is restarted, that is. Once you run ctrld restart on your router, the config is deployed.
Custom Config: Local Config Mode
Don't want any of this fancy stuff and prefer to edit the config on disk, like a normal person? No problem, simply run these 2 commands:
ctrld stop- This stops the service and restores your original DNS settingsctrld start- this starts the service and reads in the config on disk
From here on, your installation of ctrld is decoupled from the API, and you can edit the ctrld.toml config as you wish. To enforce the changes, run the ctrld restart command.
"I Want to Use Other DNS Resolvers"
If you're currently not a Control D user and were not blown away by the above enough to become one (wut?), you can still use ctrld with any DNS provider of your choice. First, you still need to get ctrld onto your router, which can be done one of two ways:
- Run the installer:
sh -c 'sh -c "$(curl -sL https://api.controld.com/dl)"' - Download the binary manually from GitHub
Hopefully, you put the binary into a location within your system path, or you have to execute it from the directory where you put it.
After this, simply run: ctrld start --config /path/to/config.toml
Alternatively, you can run it without the --config param, which will generate a default config (that uses Control D free DNS resolvers) so you have a working starting point. Then feel free to edit it to your heart's content, and run ctrld restart to enforce your changes. If you have any trouble, you can check out the Troubleshooting Guide, or contact us. We're here to help.
That's all, folks.