Thus far, we've talked about how to route your browser traffic through Control D; now, we'll cover how to route all traffic from your computer through Control D, starting with the ever-popular Windows platform.
The Different Types of DNS
As you may already be aware, DNS comes in two flavors: Unencrypted (aka Legacy DNS) and Encrypted (aka Secure DNS). Whilst almost all versions of Windows support Legacy DNS, only Windows 11 has native support for Secure DNS.
Given we are in the business of online privacy and security, we highly recommend choosing encryption wherever possible; if you are running Windows 10 or an earlier version, please consider upgrading for benefits that go beyond just the ability to use Secure DNS.
If you are unable or unwilling to upgrade, you can choose to use our ctrld utility as an alternative. This tool eliminates the need to use Legacy DNS resolvers entirely - even for devices that only support them - meaning you have no need to keep track of your IP and your connections use secure, encrypted DNS protocols. Keep in that this method is geared towards power users and does require some familiarity with routers and networking concepts.
Secure DNS is available via three distinct protocols: DNS-over-HTTPS (DoH), DNS-over-QUIC (DoQ), and DNS-over-TLS (DoT). Of the three, DoH is the protocol currently supported by Windows 11.
You can alter the DNS settings on Windows 11 through command prompt and/or the GUI; in this article, we will cover the options for setting up Secure DNS. If you are running an older version of Windows and/or want to set up Legacy DNS, check out the paired article to this one.
Universal Method - Use Our GUI App
This will work on any version of Windows.
Step 1
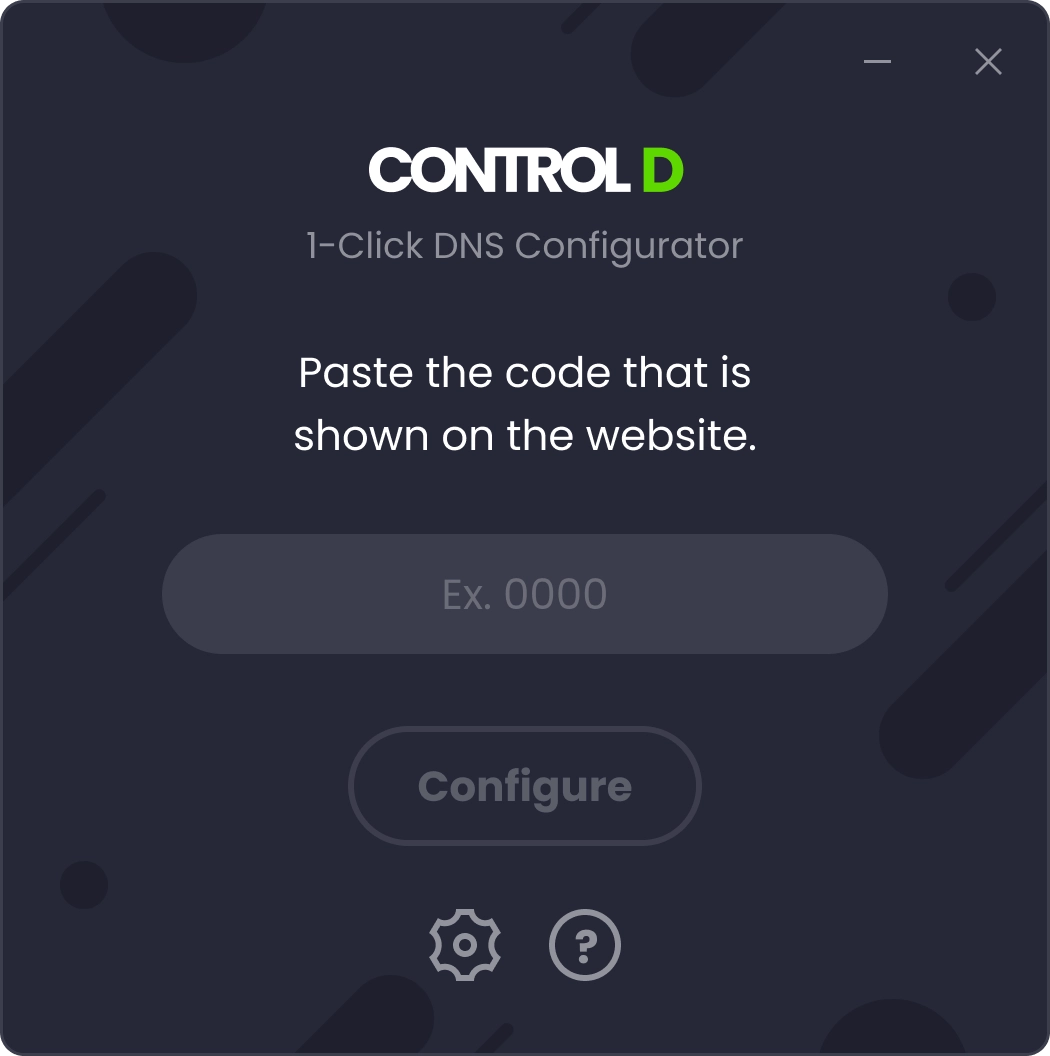
Download the app and run it.
Step 2
Input the configuration code you see in the control panel.
The code is your unique DNS resolver ID, which you can find as part of your DNS-over-HTTPS URL, after the slash: https://dns.controld.com/abcd1234.
You can find this by navigating to the Manage Profiles & Devices page of your Control D panel, finding the Windows device you set up, clicking the three dots, and selecting Show Resolvers.
That's it, you're done!
Windows 11 Version 21H2: Command Prompt & GUI Method
If you are running Windows 11 version 21H2, then you have to set your DNS resolver using a method that involves both command prompt and the GUI. We highly suggest using the GUI app method mentioned above if you want to avoid this.
We have a video version of this method available for those that prefer to skip the text!
Step 1
Open Command Prompt in Administrator Mode.
Step 2
Enter the following command into the terminal:
netsh dns add encryption server=$DNS_IP dohtemplate=$DNS_HASHWhere $DNS_IP is the legacy DNS IP address of the resolver you wish to use and $DNS_HASH is the desired resolver's DoH URL.
For example, if we wanted to enable the free ad-blocking resolver, you would run this command:
netsh dns add encryption server=76.76.2.2 dohtemplate=https://freedns.controld.com/p2If you are setting up a custom premium resolver, the command would be as follows:
netsh dns add encryption server=$DNS_IP dohtemplate=https://dns.controld.com/$UIDWhere $DNS_IP and $UID are the unique identifiers for your Control D Windows device. You can find these by navigating to the Manage Profiles & Devices page from your Control D panel, finding your Windows device, clicking the three dots, and selecting Show Resolvers.
Step 3
Type in the following command:
netsh interface ipv4 set dns name="$INTERFACE_NAME" static $DNS_IPWhere $DNS_IP is the unique IP from your Control D Windows device, and $INTERFACE_NAME is the name of your network adapter; you can find the latter by entering the following command:
netsh interface show interfaceChoose the network that is both Enabled and Connected.
Following the example in the previous step, if we wanted to enable Control D's free ad-blocking resolver on your "Wi-Fi" interface you would run this command:
netsh interface ipv4 set dns name="Wi-Fi" static 76.76.2.2If you are instead setting up a custom premium resolver on your "Ethernet" network, the command would be as follows:
netsh interface ipv4 set dns name="Ethernet" static $DNS_IPStep 4
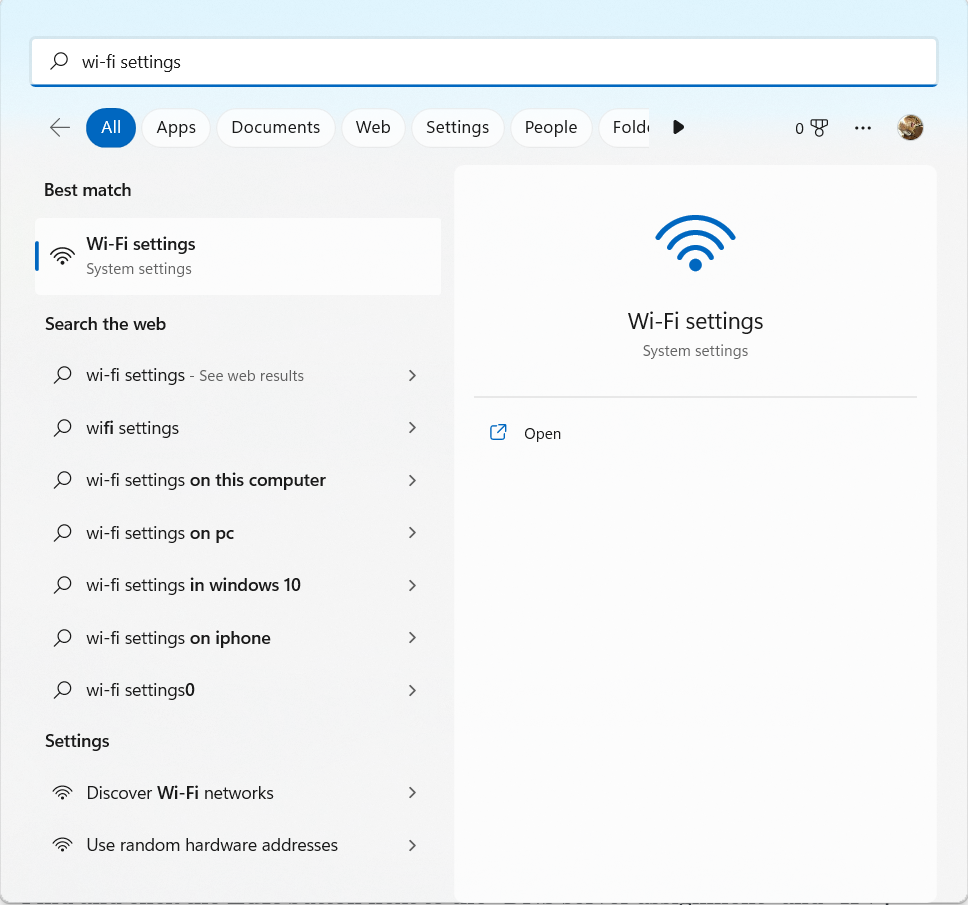
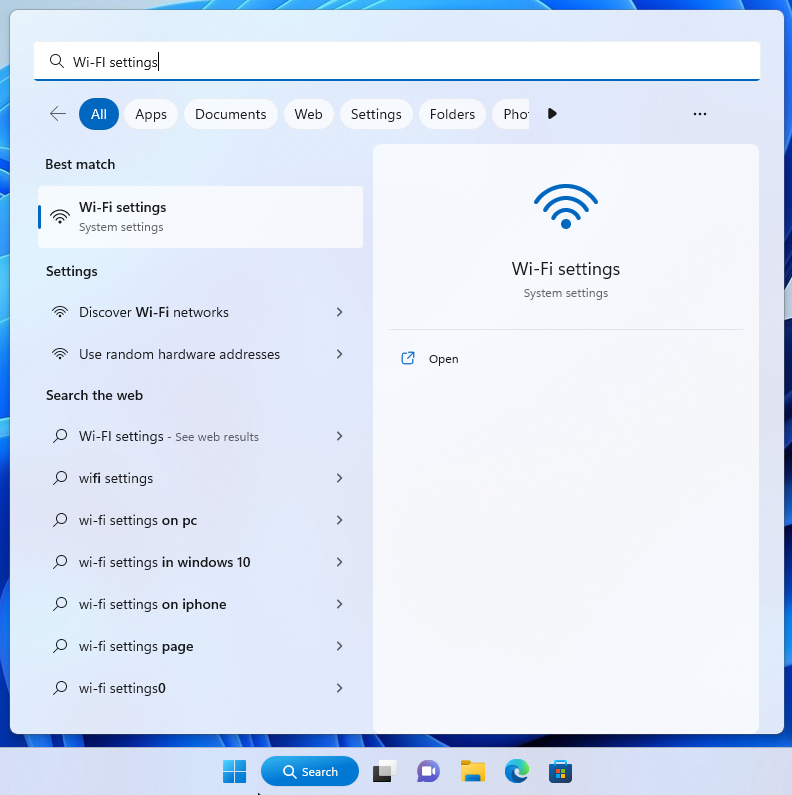
The remaining steps must be done through the GUI. Click Search on your taskbar, and type in Ethernet Settings or Wi-Fi Settings, depending on what you are using.
Step 5
If you are modifying a Wi-Fi network, you will need to click on Hardware Properties.

Step 6
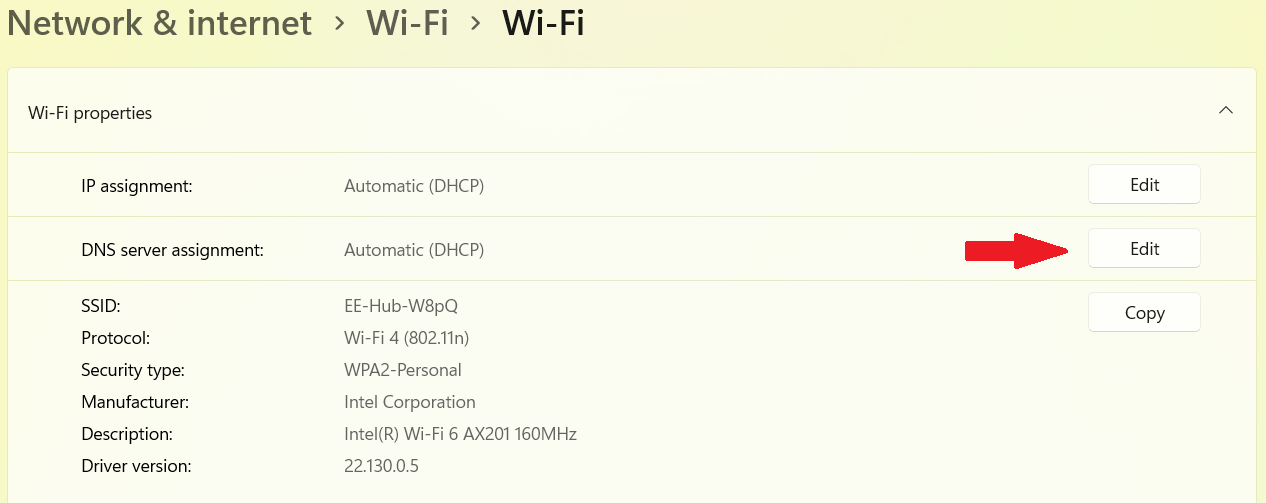
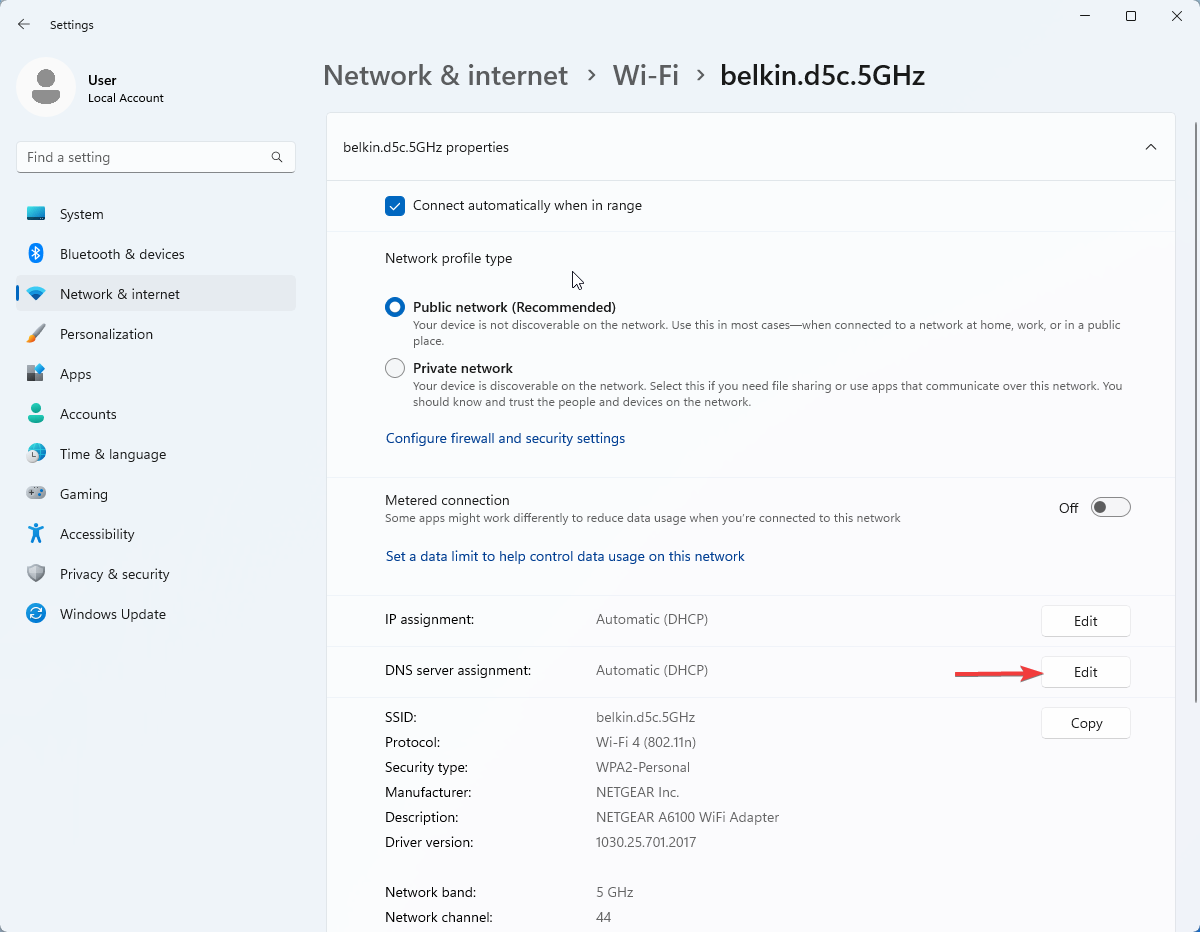
Find and click the Edit button next to the DNS server assignment.
Step 7
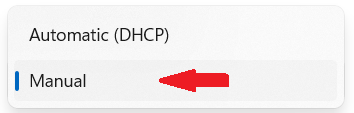
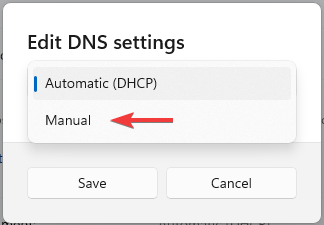
Open the drop-down menu and select Manual.
Step 8
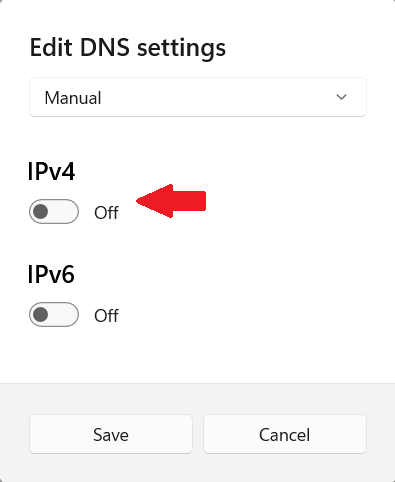
Toggle the IPv4 switch to On.
Step 9
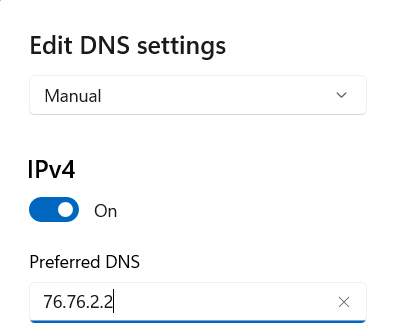
In the Preferred DNS field, enter the legacy IP of the resolver you wish to use.
Step 10
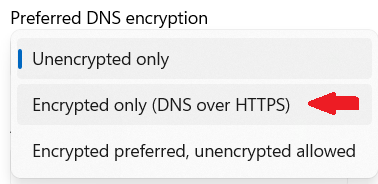
Open the drop-down menu under Preferred DNS encryption and select Encrypted Only (DNS over HTTPS).
Step 11
Click Save. You're done!
Windows 11 Version 22H2: GUI Method
Version 22H2 of Windows 11 brings in full support for custom DNS, allowing users to set up a custom DNS using only the GUI. If you are not confident using command prompt, then you will need to make sure you have updated to this version (or use the GUI setup app).
Step 1
Click the Search button on the taskbar, and type in either Ethernet Settings or Wi-Fi Settings, depending on what type of connection you are using.
Step 2
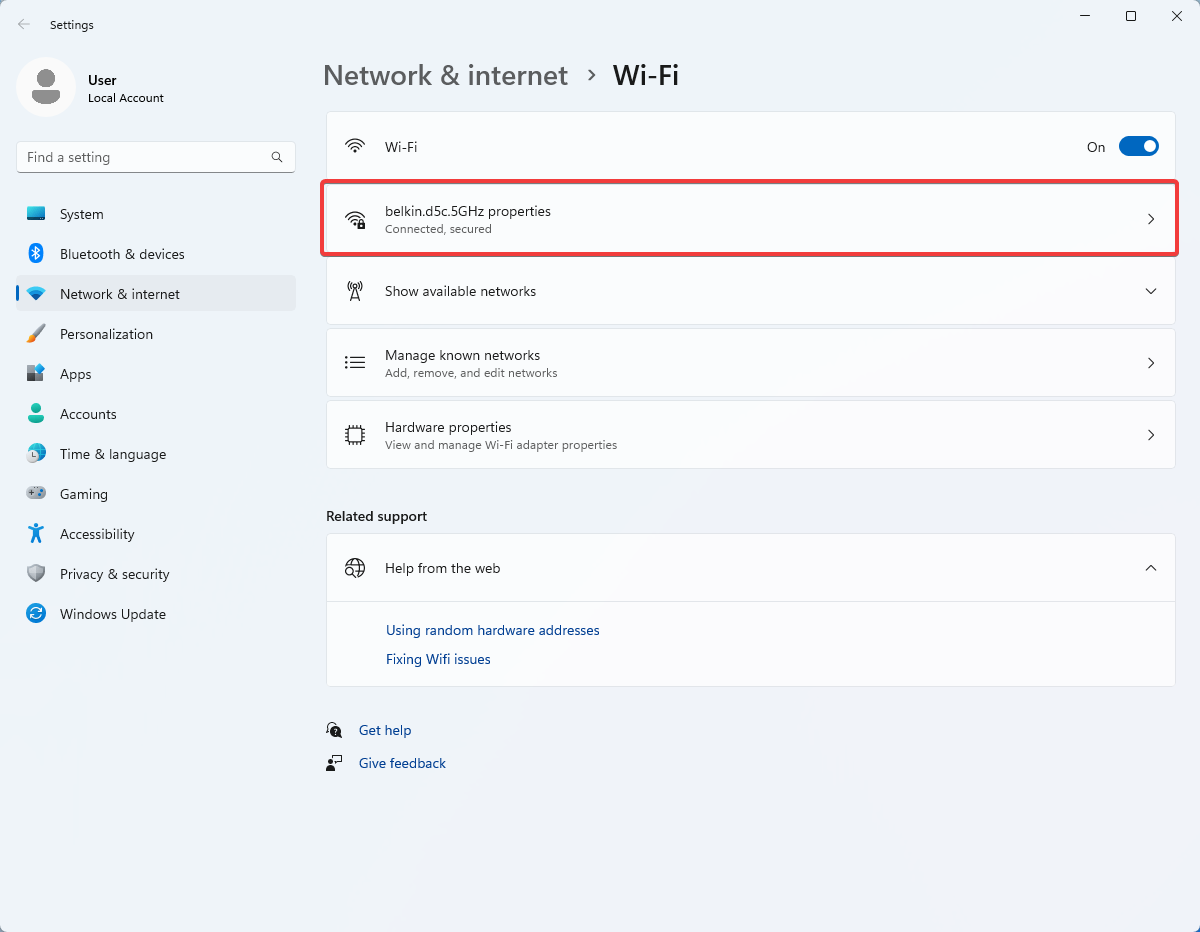
If you are using Wi-Fi Settings, then you will need to look for and click on the Wi-Fi ID you want to modify.
Step 3
Look for and click on the Edit button.
Step 4
Open the drop-down menu, and select Manual.
Step 5
Toggle the IPv4 switch to On.

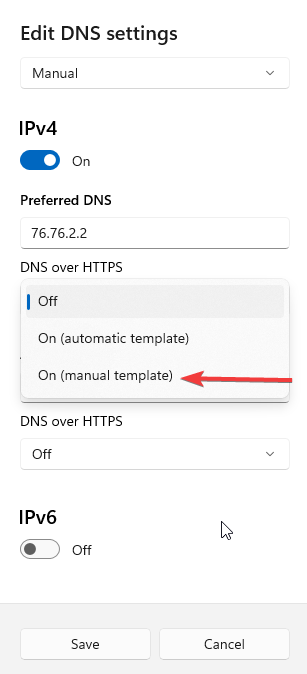
Step 6
Enter the legacy IP of the resolver you are intending to use, then open the drop-down menu under DNS-over-HTTPS and select On (manual template).
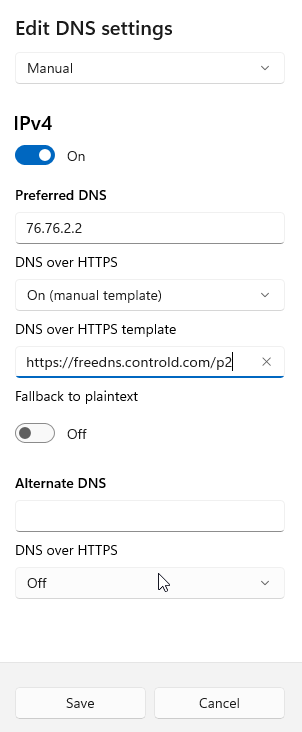
Step 7
In the DNS-over-HTTPS template field, enter the DoH URL of the resolver you wish to use.
Step 8
Click Save. You're done!
You're Good to Go!
If you have successfully followed one of these methods, then everything should be good to go, and you can begin using your newly-secured Windows device.
If you require assistance, reach out to us via the links below, and we'd be happy to help!
Contact Us: https://controld.com/contact/
Feedback Portal: https://feedback.controld.com/